NOTE: This topic presents information needed
oin the preliminary operations of the Self-Guided Training around the Inventor Integration
oby developers who need to know how the integration works and how to implement it.
The Inventor integration includes an Inventor Add-In that must be installed in Inventor. This add-in enables the user to send and receive kBridge data within Inventor.
How it works
The integration works by generating an intermediate XML file from kBridge that is used by Inventor to generate the model and drawings. It also includes a library of kBridge mixins that can be used to automatically generate the intermediate file based on the parts in your kBridge model.
This document will first walk you through setting up the Inventor Integration, then provide a working example.
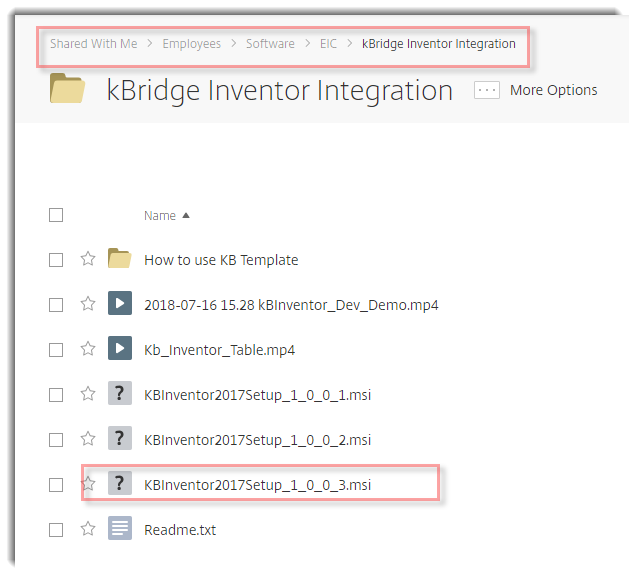
kBridge Inventor Integration download
Download the appropriate latest KBInventor[year]Setup... Inventor 2016, Inventor 2017 or Inventor 2019
Link: https://drive.google.com/drive/u/1/search?q=kbInventor
Note that this link may change.
Install as administrator
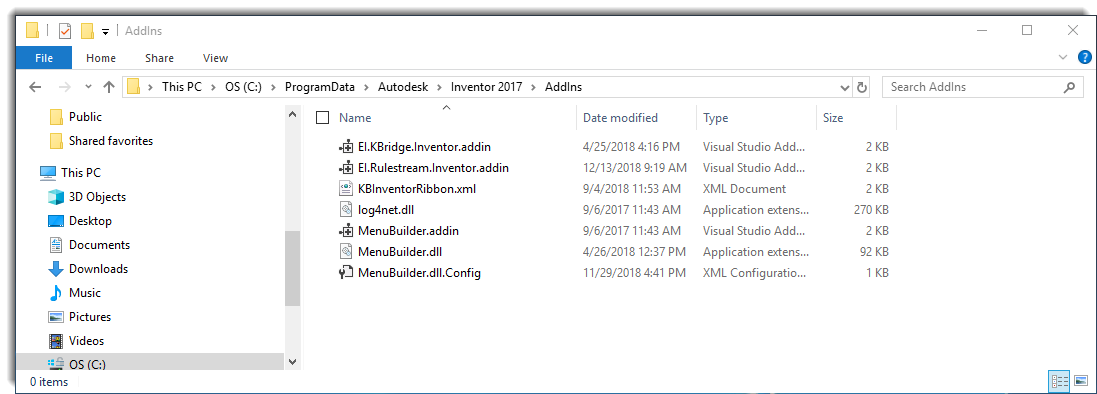
These files will install in two areas, as follows:
(1)
‘C:\ProgramData\Autodesk\Inventor 2016\AddIns’ - for Inventor 2016 installation, or...
‘C:\ProgramData\Autodesk\Inventor 2017\AddIns’ - for Inventor 2017 installation, or...
‘C:\ProgramData\Autodesk\Inventor 2019\AddIns’ - for Inventor 2019 installation
(2) "C:\Program files\EIC\KbInventor."
Image shows Inventor2017 (2016,2019 are similar).
When you open Inventor it will ask you if it is OK to except the add-ins. Except.
Open Inventor
Select the Tools tab/ Add-ins and set EI kBridge, EI Rulestream, and Menu Builder to Automatic / Loaded.
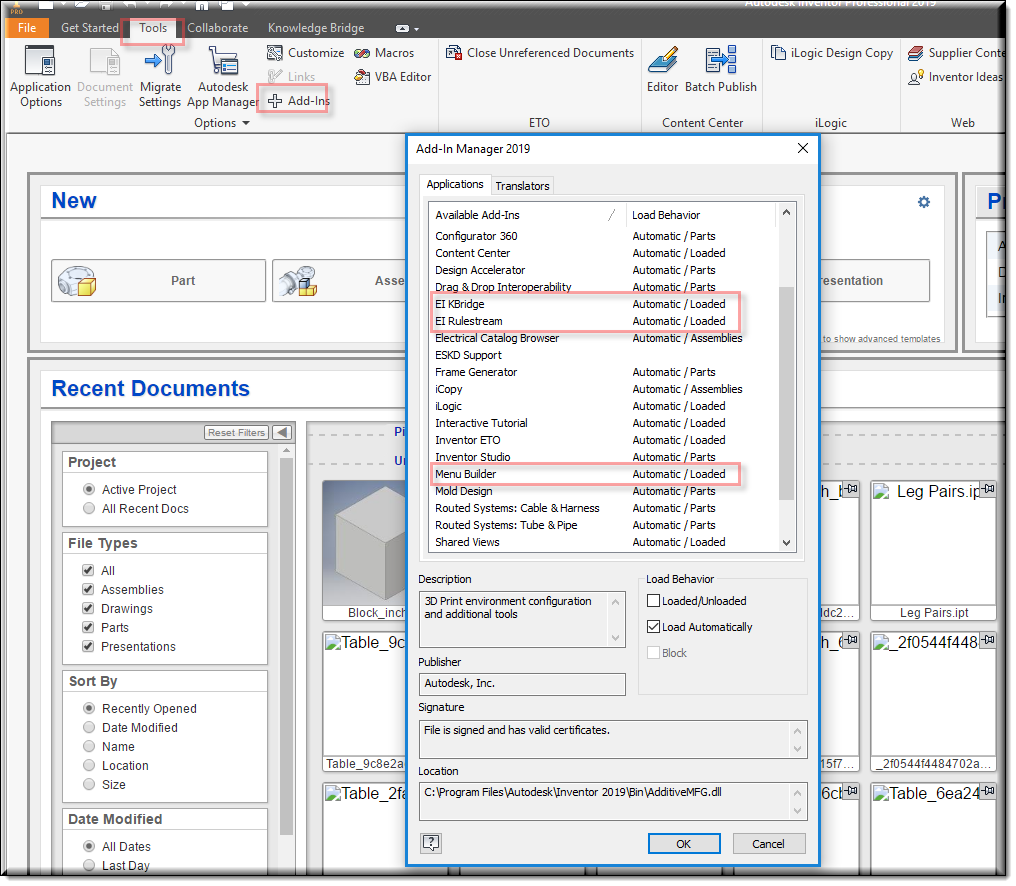
Restart Inventor
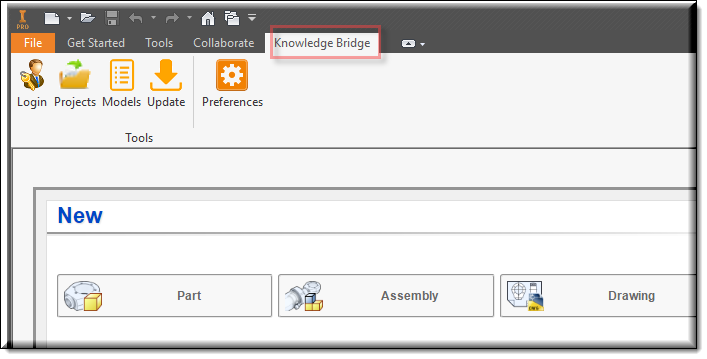
You should now have a Knowledge Bridge tab on Inventor"s menu bar.
![]()
A mini tutorial on using the kBridge Inventor Integration
This is designed for developers who want to exercise the kBridge Inventor integration, but who do not want to perform all the steps in the more comprehensive Self-Guided Training for Inventor integration.
Shapes Mini-project
Note: this mini-project adopts a Shapes Project from the DWG integration Self-Guided training. For this example you don’t need to add the MyLine part Design.
Open the Shapes project
Then go into the project tree and right click on Designs. Select ‘New Design…’. Name it ShapesApplication. Add InvApplication to the Mixins.

In ShapesApplication(1) in the Child tab, select InvInventorProjectName. Add ‘Shapes’ and Apply.
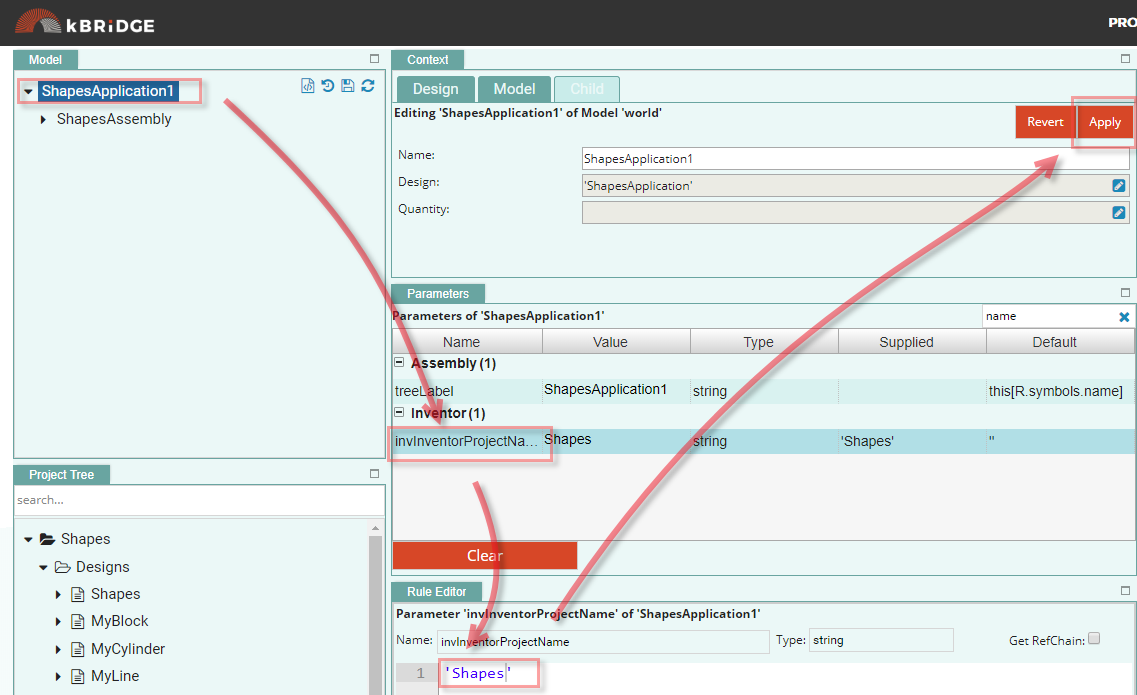
Make ShapesApplication the root by going into the Project tree, expanding Shapes/Designs, then right click on ShapesApplication and select ‘Set As Root’
Now in designs, drag Shapes into ShapesApplication(1) in the model window. Rename Shapes to ShapesAssembly and Apply.

The DWG integration Shapes Project had a Root with Parts as children below it. For this to work with Inventor, we need to have the Root, then an Assembly, then the Parts below the Assembly.
Save Project
Select the Save icon and save as Shapes and select the Set as Default Model box.
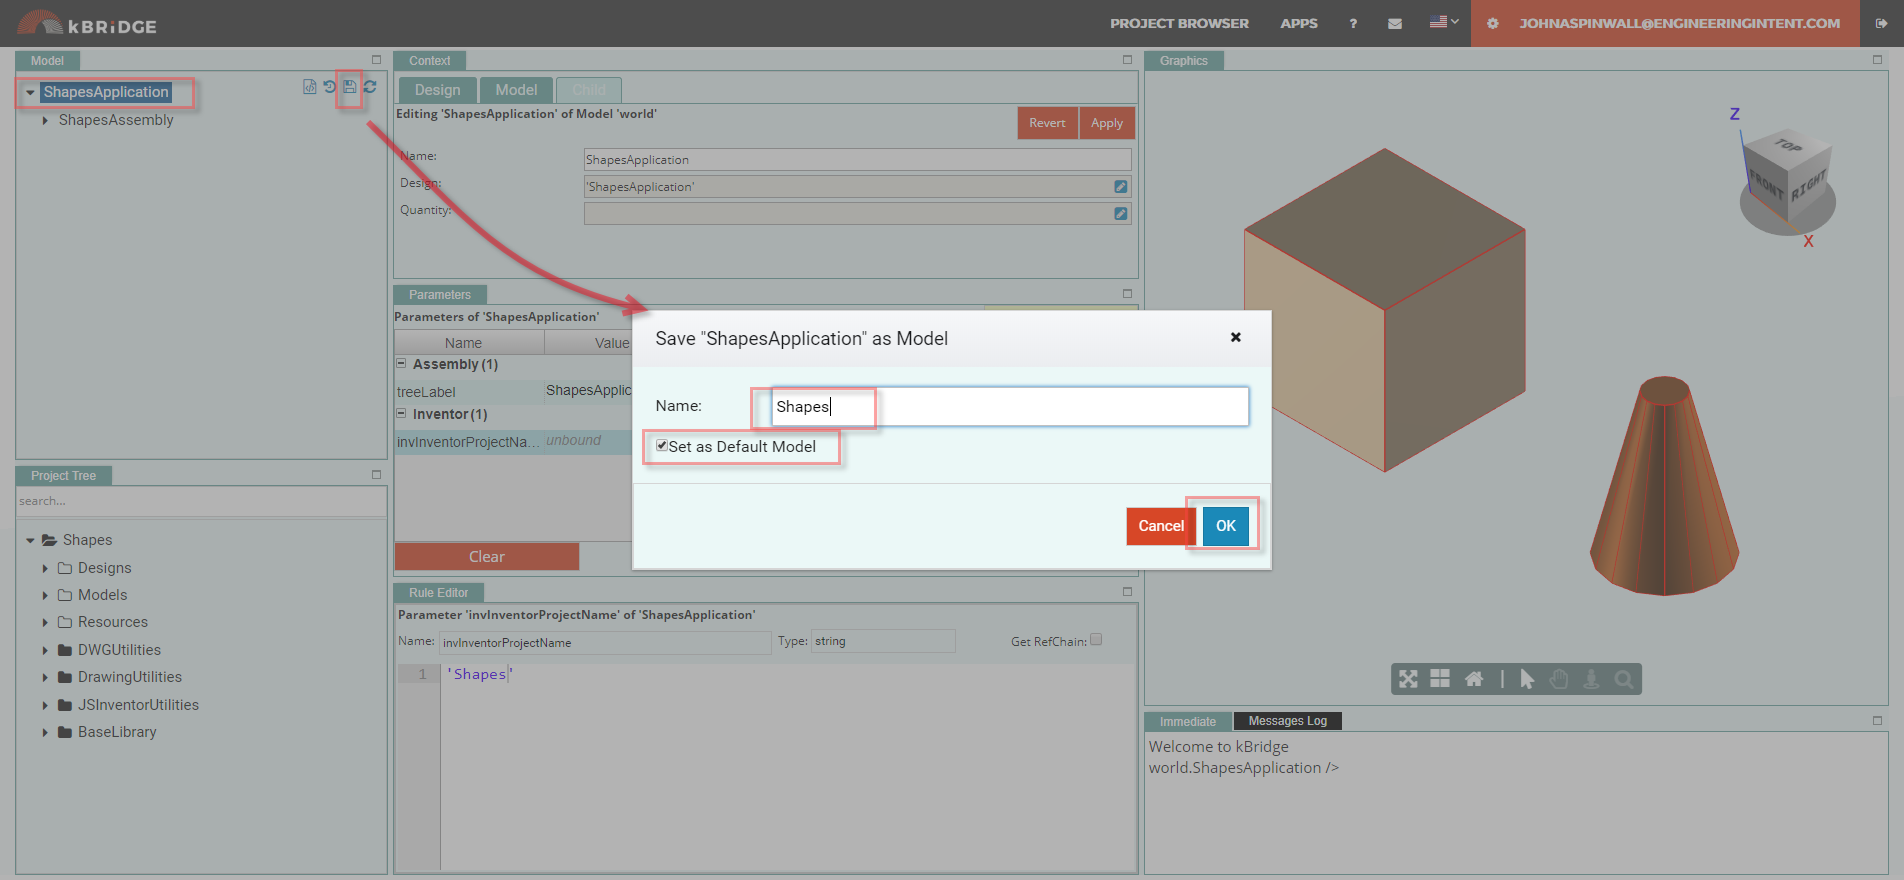
Close and restart the Shapes Project.

Add Mixins to ShapesAssembly
In the Design Tab in ShapesAssembly add InvAssemblyDocument to the Mixins and move that Mixin to the bottom by clicking on the arrow-down symbol.

Add Parameter Value
In ShapesAssembly/child tab/invTemplate type in "Factory/Assembly_inch.iam" and Apply.
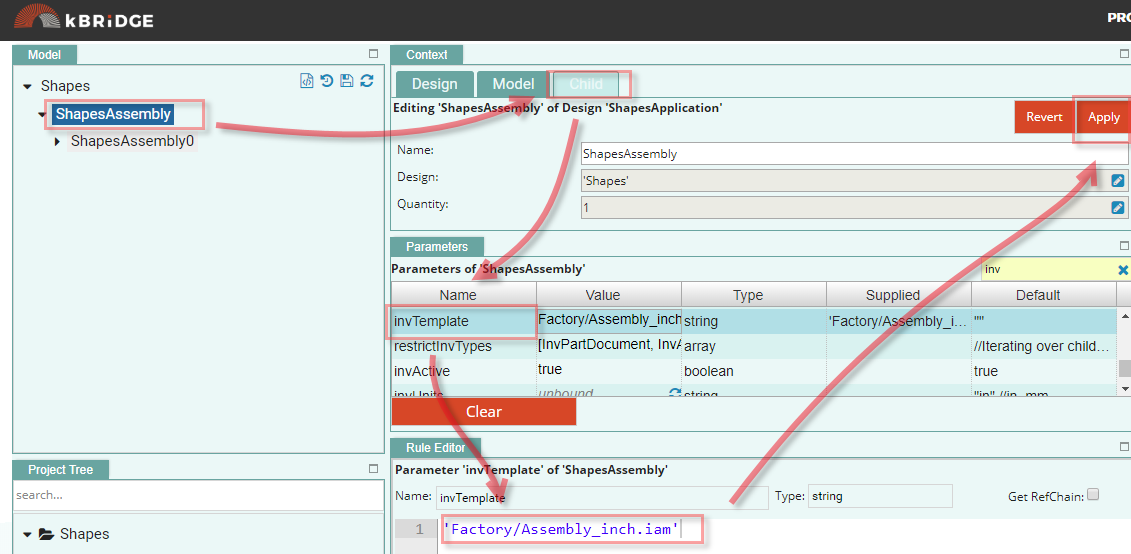
Delete MyLines
We are going to use only two parts for the Inventor integration so if you have a MyLines part delete it. That should leave MyCylinders and MyBlocks.
To remove MyLines, in ShapesAssembly/Design Tab/MyLines click Delete.
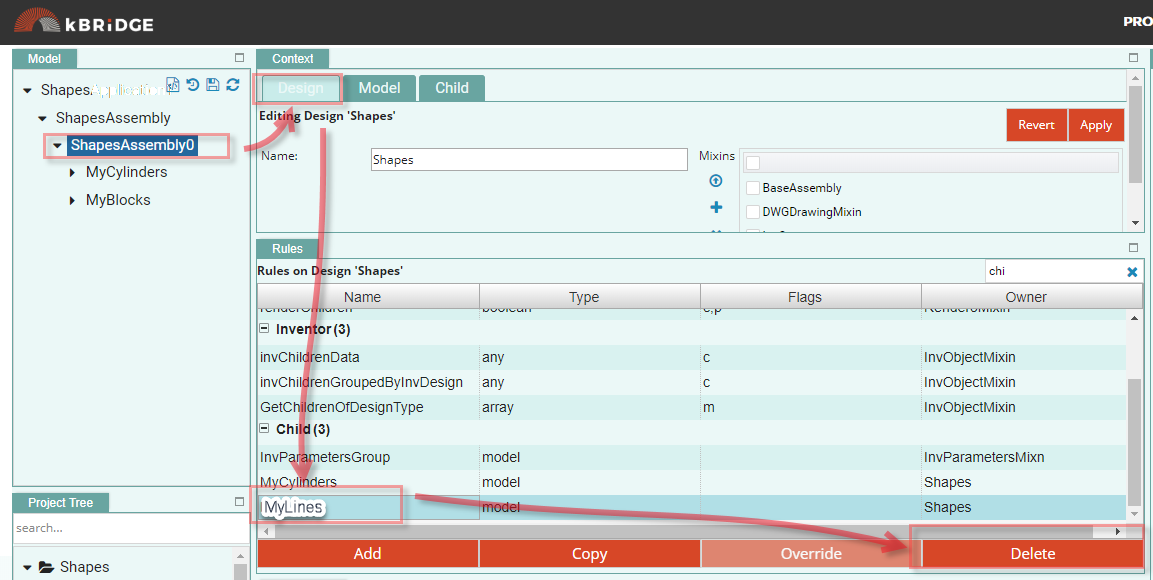
User Option
If the user has difficulty creating these models or wants to save time, the user could download the shapes.zip from resources into the appropriate folders and skip the ‘Make parts in Inventor’ section.
Make parts in Inventor
Open Inventor, Make a block in Sketch, then in the Manage Tab select Parameters and add (height, length, and width)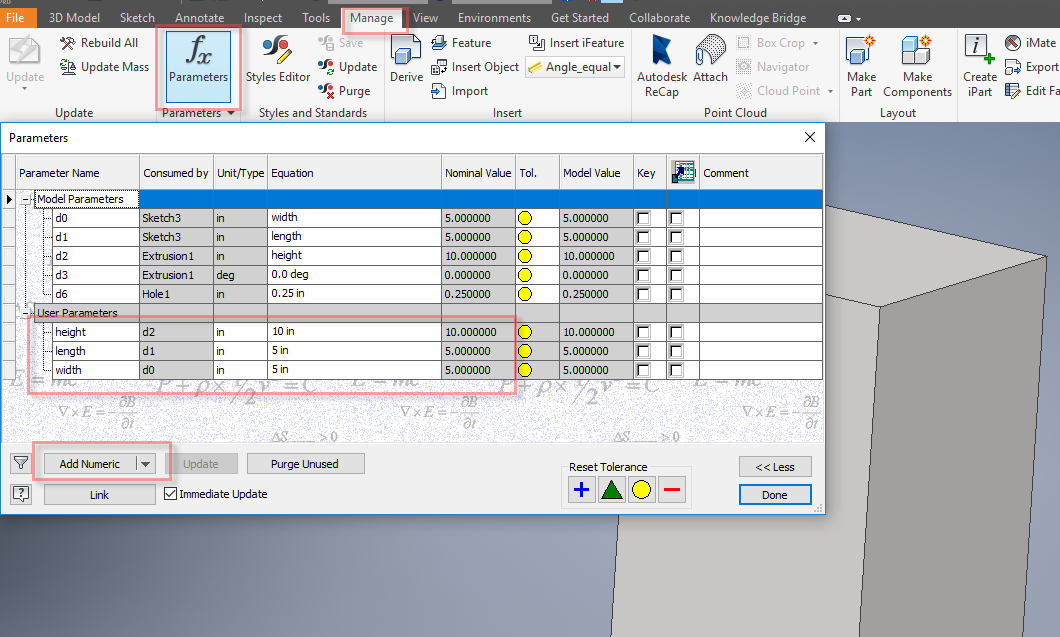
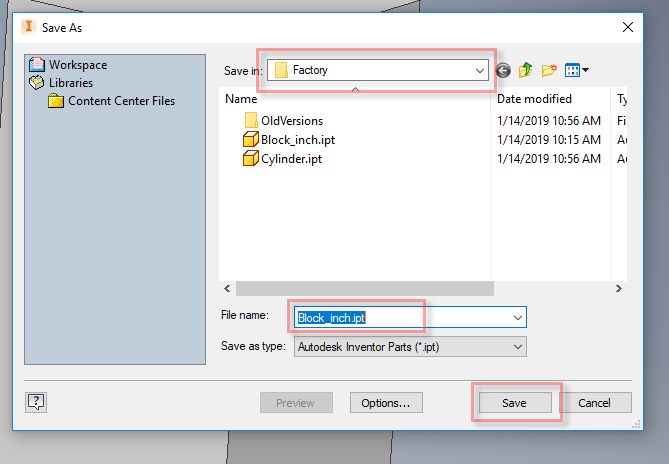
Save as C:\Shapes\Factory\Block_inch.ipt
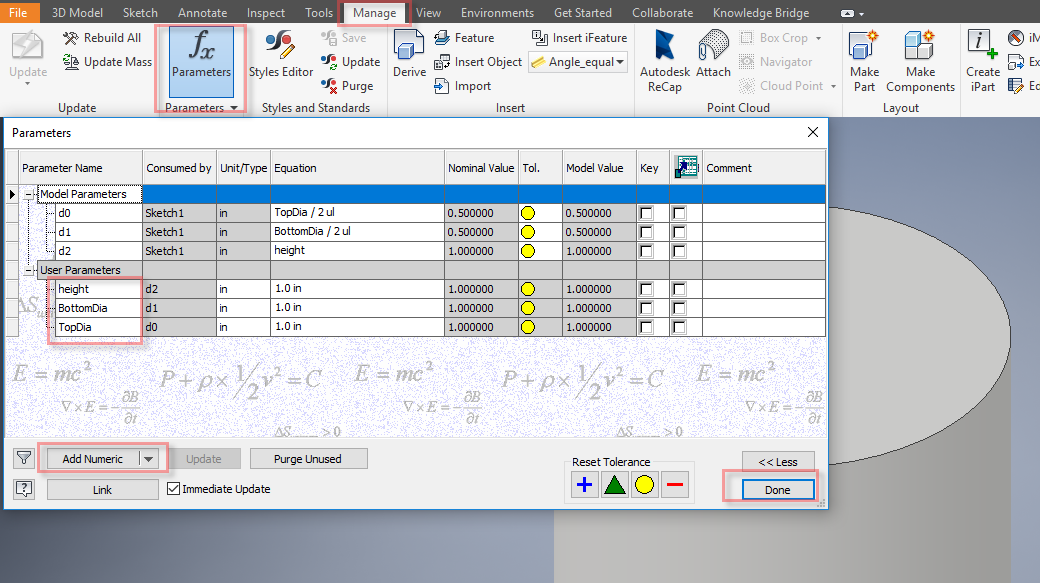
Make a Cylinder in Sketch, then in the Manage Tab select Parameters and add (height, BottomDia, and TopDia)
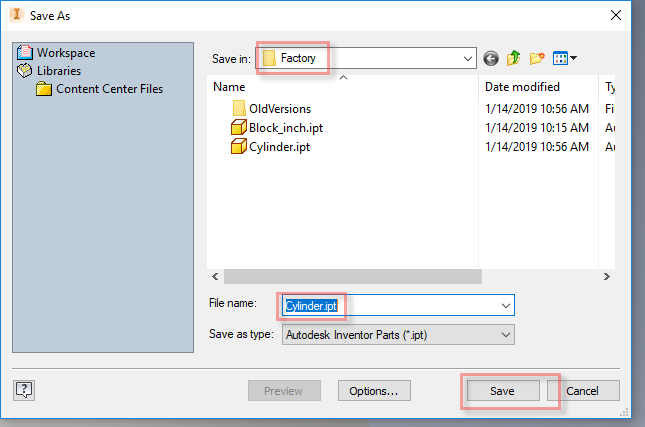
Save as C:\Shapes\Factory\Cylinder.ipt
Add Rules to MyCylinder
In MyCylinders/Design Tab/Add
Name: TopDia
Type: number
Flags: cached
Value: this.topRadius*2
Apply
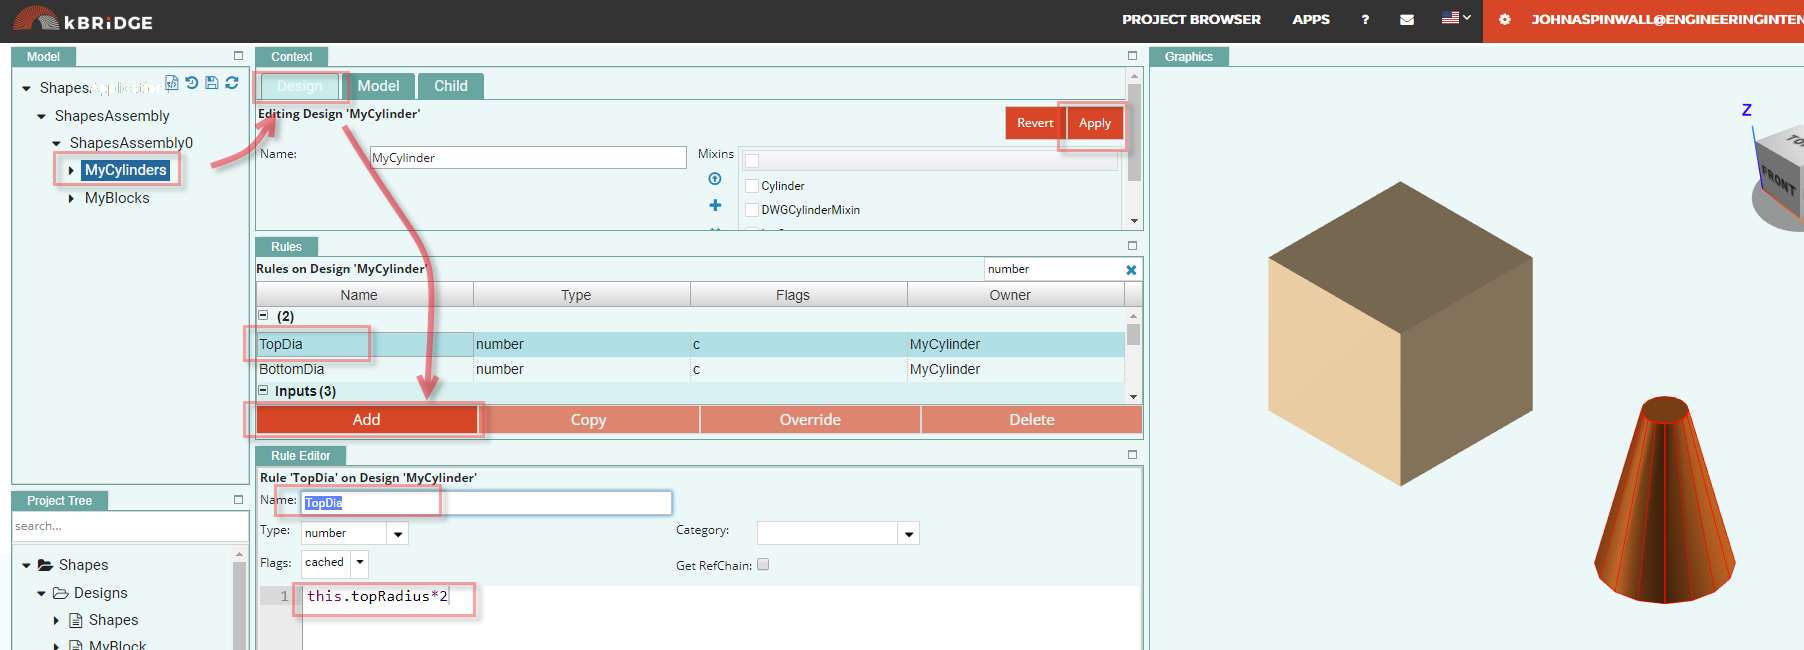
In MyCylinders/Design Tab/Add
Name: BottomDia
Type: number
Flags: cached
Value: this.radius * 2
Apply
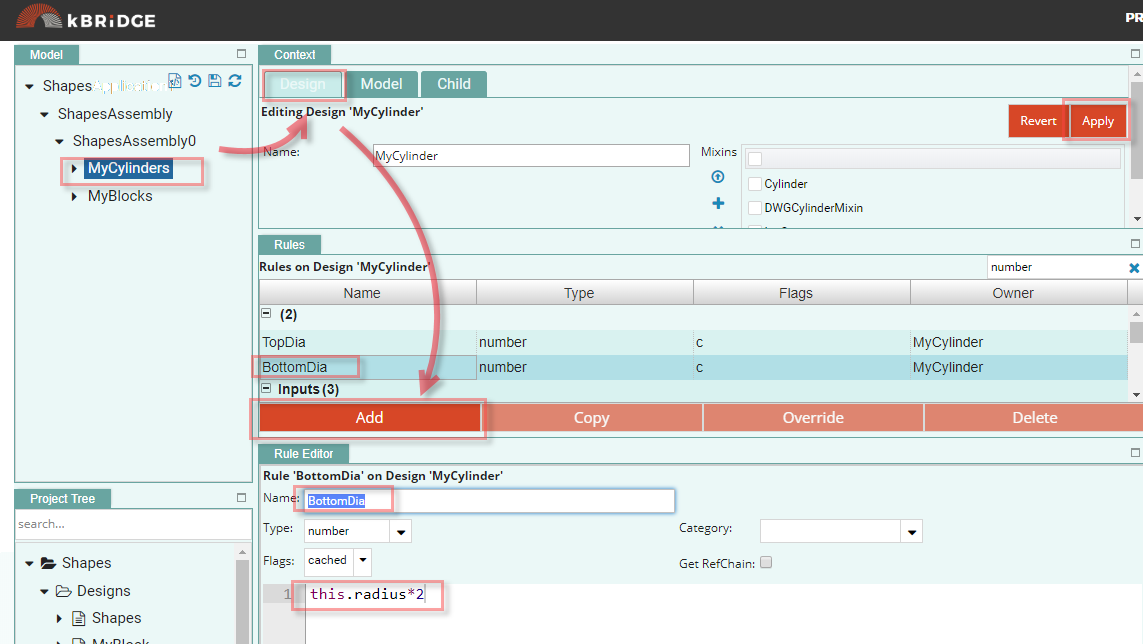
The MyBlocks part already has the matching rules as in Inventor (length, width, and height)
NOTE: Remember kBridge is case sensitive.
Add Mixins to MyCylinder and MyBlocks
In MyCylinders and MyBlock /Design Tab/Add InvPartDocument mixin and move to the bottom of the mixins list using the down arrow. Apply

Add value to invParameters in Parts
In MyCylinders /Child Tab/invParameters add this array:
[{"ParameterName": "height", "ParameterUnits": child.invUnits},
{"ParameterName": "TopDia", "ParameterUnits": child.invUnits},
{"ParameterName": "BottomDia", "ParameterUnits": child.invUnits}]
In MyBlocks /Child Tab/invParameters add this array:
[{"ParameterName": "height", "ParameterUnits": child.invUnits},
{"ParameterName": "width", "ParameterUnits": child.invUnits},
{"ParameterName": "length", "ParameterUnits": child.invUnits}]
Add invParameter to MyCylinders and MyBlock
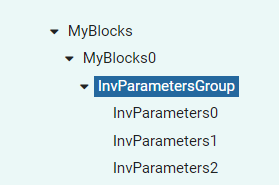
In the Project Tree expand InventorUtilities and drag invParameters into MyCylinders.
In InvParametersGroup/Child Tab/ add to Quantity: this.invParameters.length. Apply
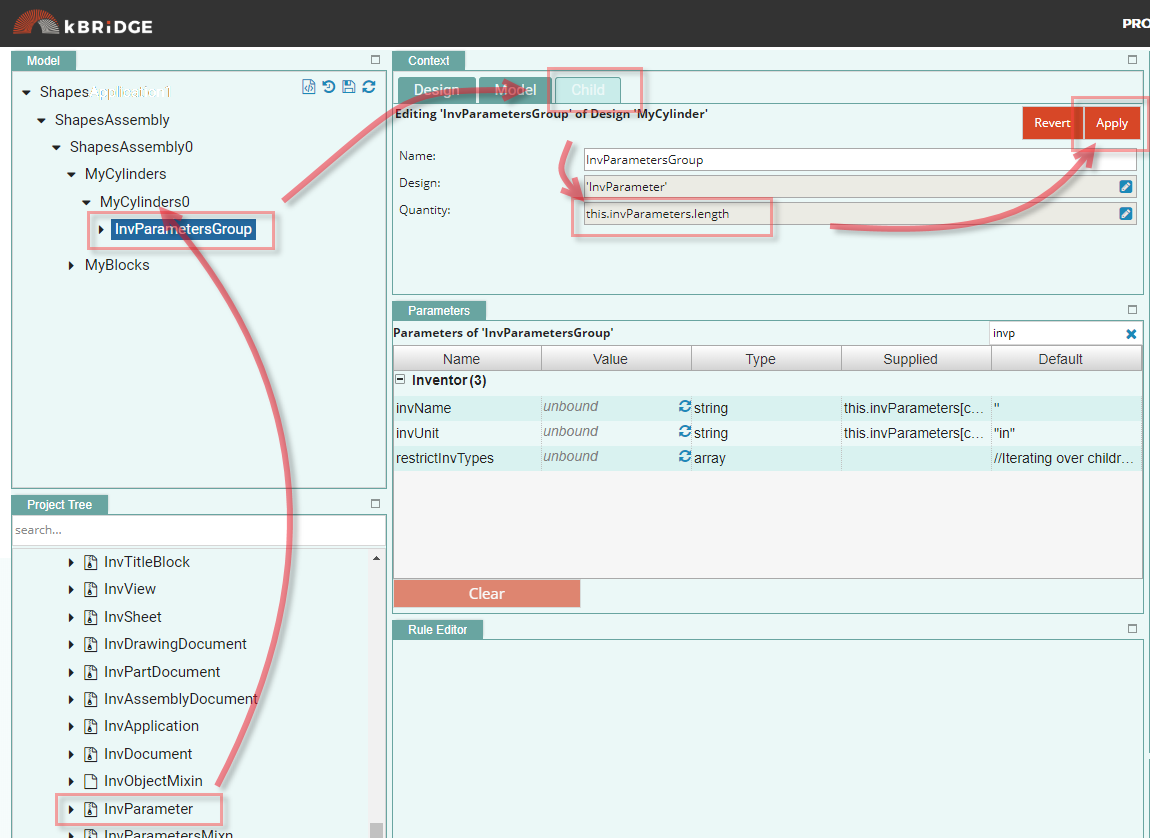
Add Rule values to InvParametersGroup
In InvParametersGroup/Child Tab/ add these values:
invName: this.invParameters[child.index].ParameterName;
invUnit: this.invParameters[child.index].ParameterUnits;
invValue: this[child.invName].toString()
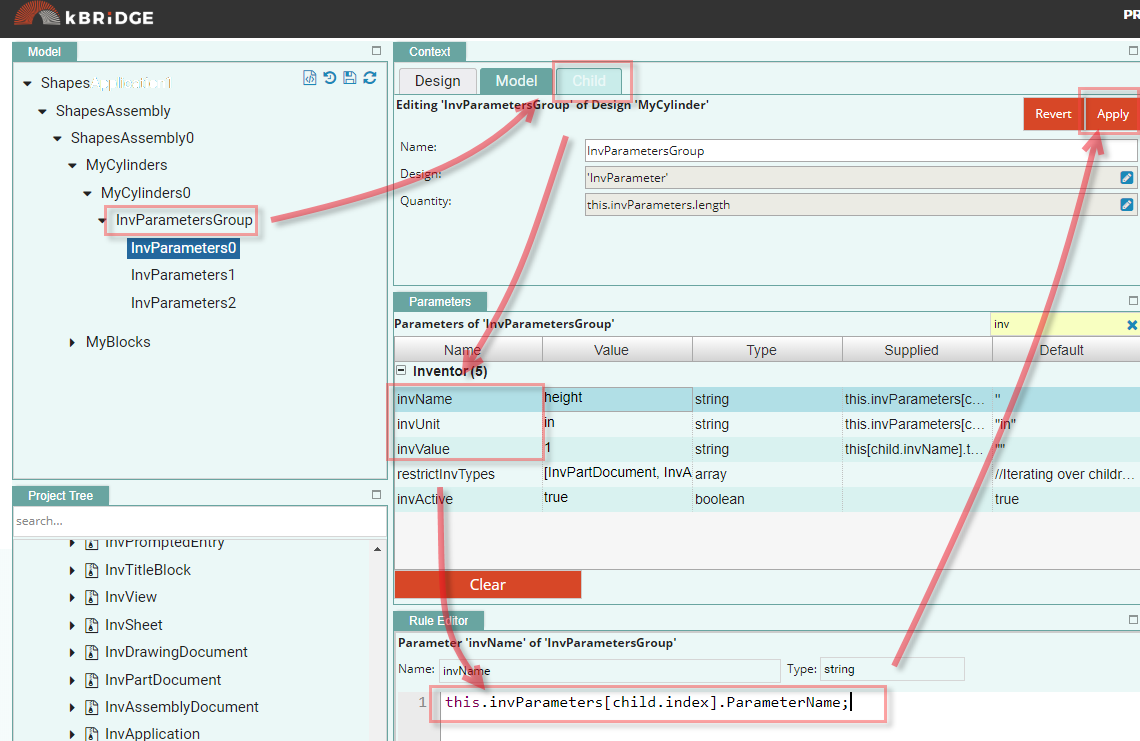
Follow the same procedure for MyBlocks.
Final operations
You should have C:\Shapes\ on your disk drive.

If you ran a test earlier, then delete the files in the MemberFiles so new files can be created when we run the Integration steps. Or set the OverWrite property to true for each document.
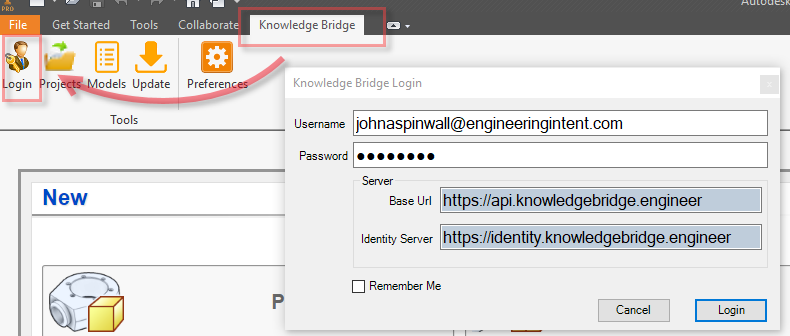
Open Inventor/Knowledge Bridge Tab/Login.
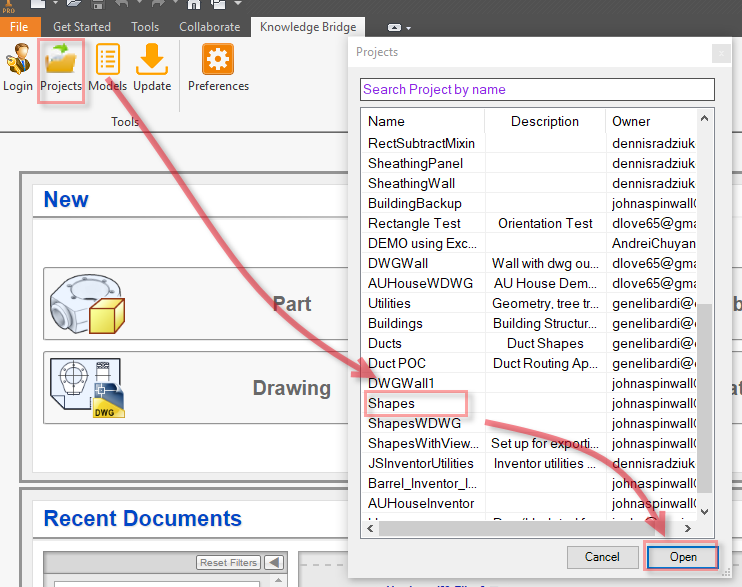
Select Projects/Shapes/Open.
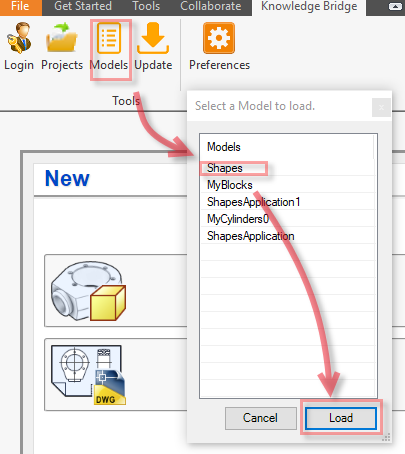
Then Select Models/Shapes/Load.
Then Select Preferences/ world.Shapes.xmlstring/ and Apply
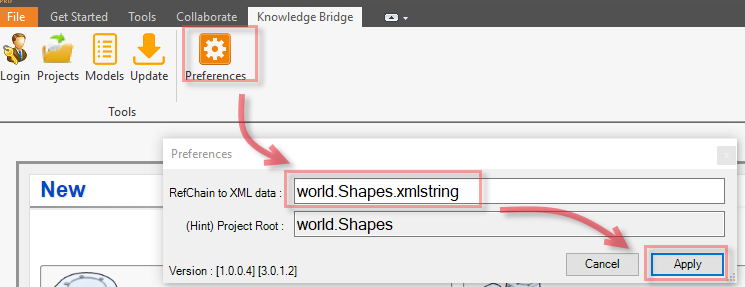
Then Select the Update icon. The model should appear in your Inventor window.
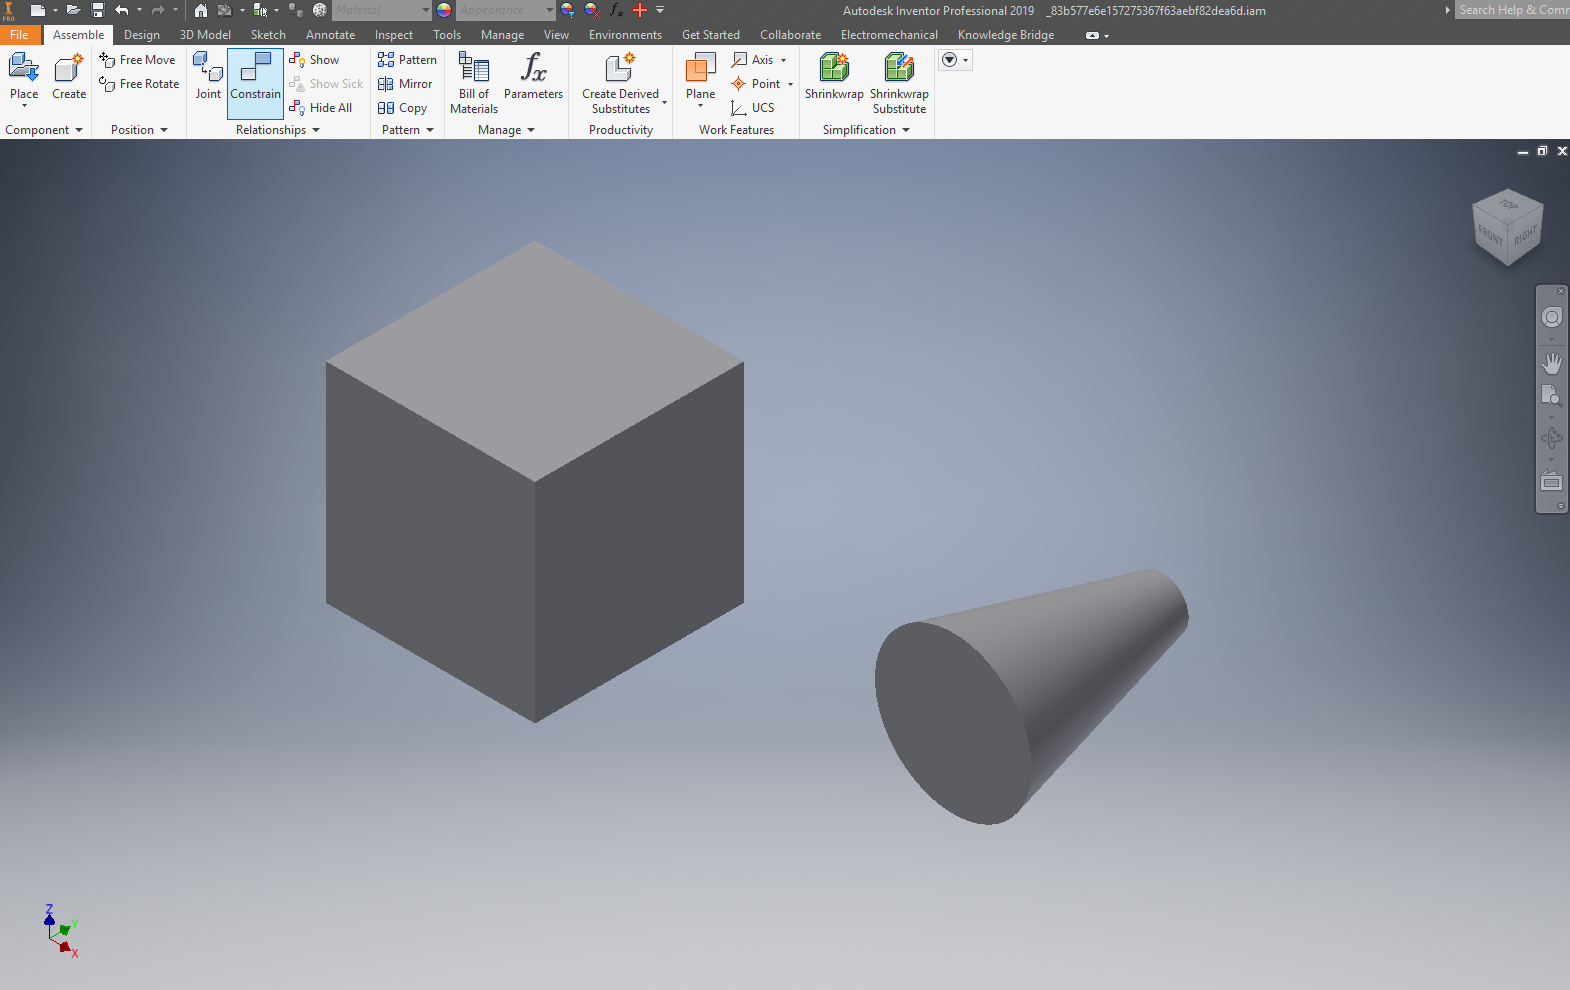
If you change the sizes of objects in kBridge, be sure to go into C:\Shapes\MemberFiles and delete the affected files. New files will be installed when you rerun the Inventor Integration.