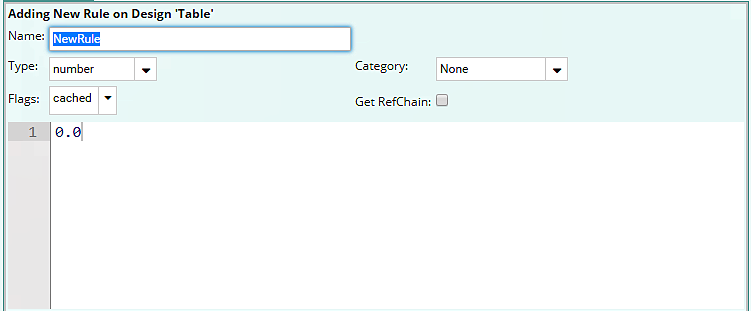
When you add a Rule, it is the Rule Editor that allows the user to
oName the Rule
oDetermine its Data Type —and see more about Data Types
oSet its Flags—and see more about Flags
oEnter the Rule Formula itself
The Name and Category on the dialog below are user-defined; you have to fill in these with whatever your want. They are useful for organizing Rules in your Project.
Adding Rules
You add a rule (a Design rule or a Child Rule) by clicking on one of the two leftmost icons in the Rule Grid:
![]()
We will cover Child Rules later; right now, you will be adding Design Rules.
Below, the Rule Editor inputs that appear after you click Add (initiate) a new Design Rule.

In the Rule Editor pane:
Name sets the name of Rule
Type sets the Rule type as array, number, string, point, etc
Flags sets the Rule as cached (always available and always evaluated), Parameter, etc
Category allows you to select which category you want your new rule to be—note that right now, your rules will mostly be Inputs; the other categories will be covered later:
•Inputs (a category you will add in this Unit's exercise)
•Geometry
•Render
•Internal
•Position
•Assembly
•None
The Get RefChain check-box (covered much later in your training) when checked allows automatic insertion into the rule expression of something you want to reference in the rule—you simply click on the design, model, or graphic you want to reference. This is similar to clicking on a cell or range of cells that contain a value in Excel that you want to reference in a formula that you are adding to the spreadsheet.
Rule Editor Input Field (with line 1 visible + line 1's default, 0.0) allows you to enter Rule formulas/values.