Description
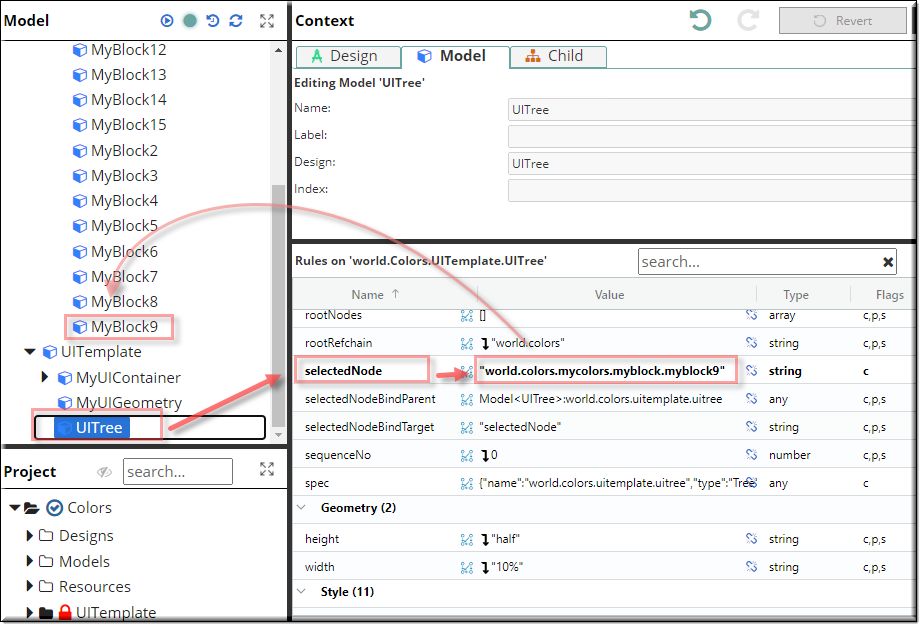
The UITree design allows the user to add a tree to the User Interface. When an item from the tree is selected a reference is displayed in the 'selectedNode' rule in the UITree model design.
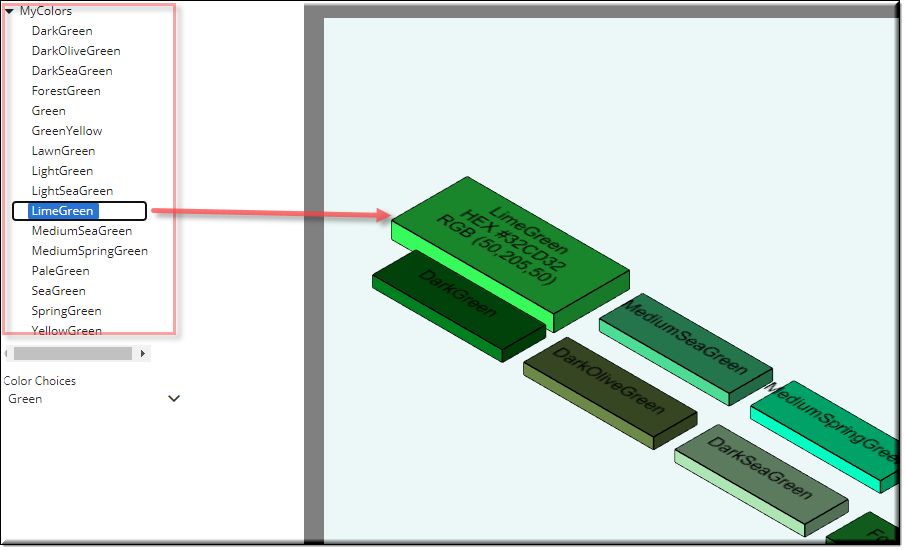
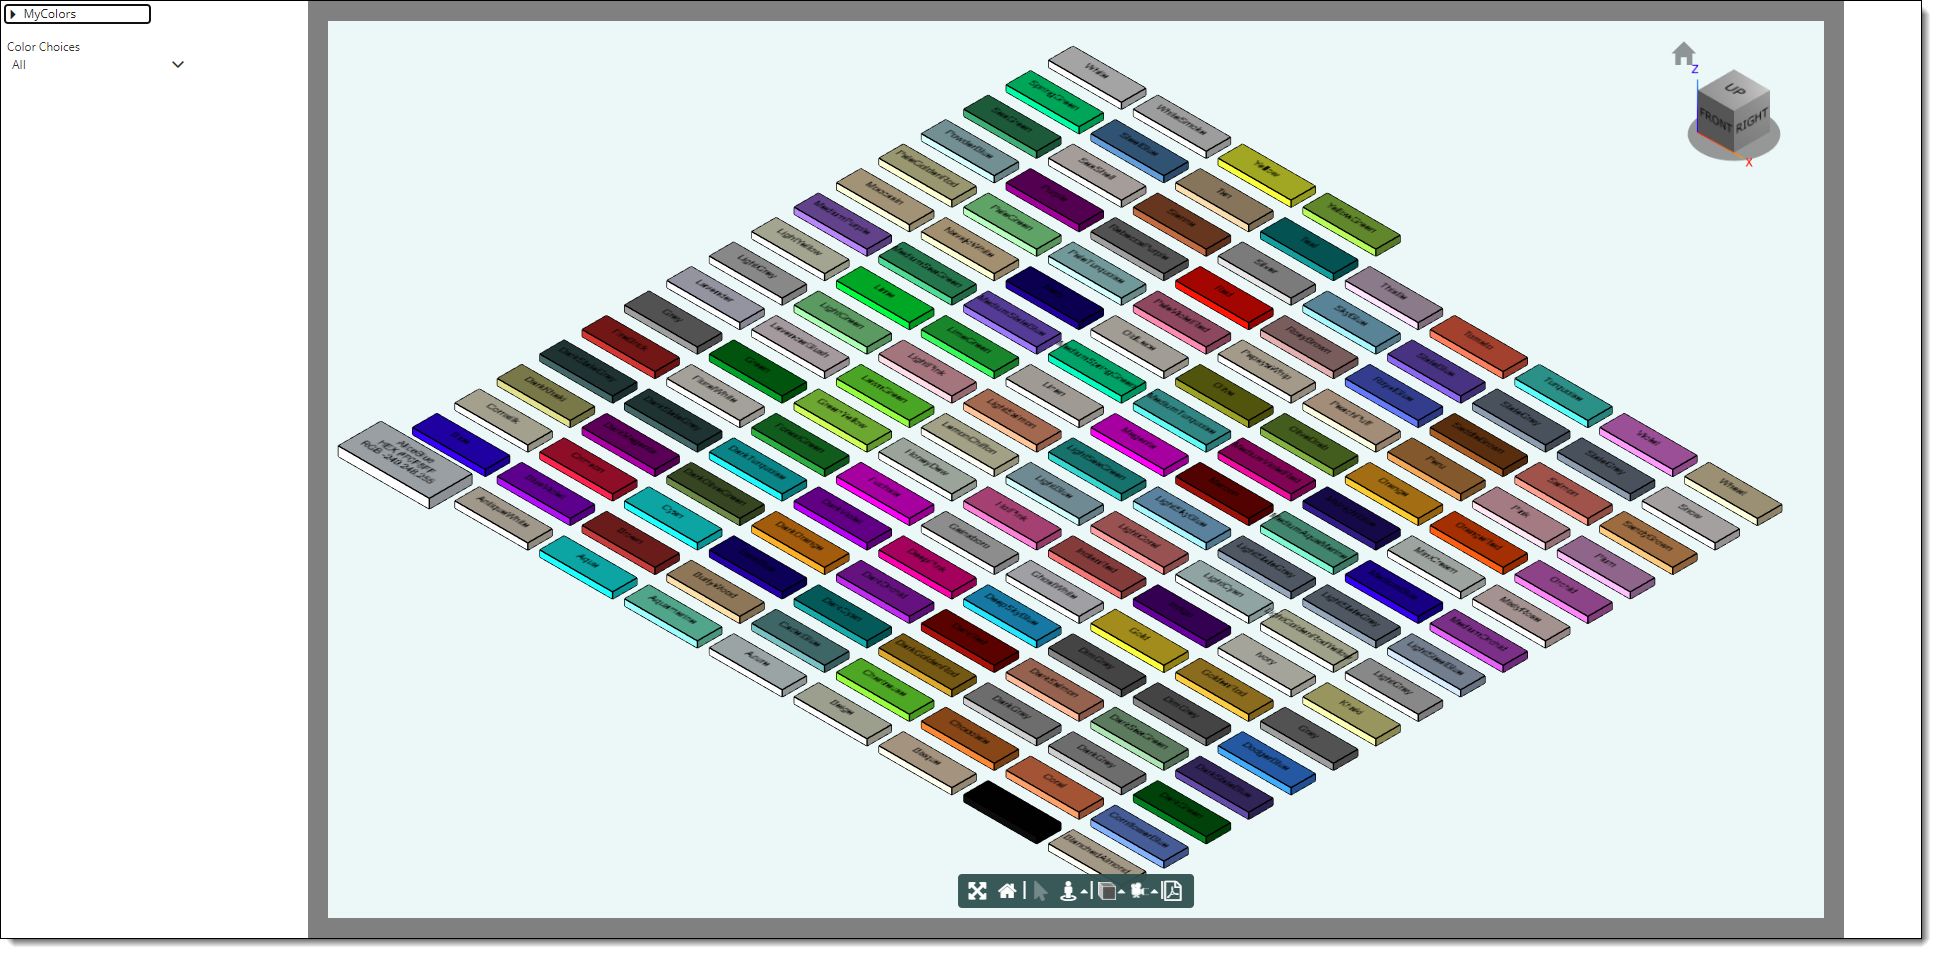
In the example shown, the height, length. width and the text were changed by clicking on the LimeGreen text in the UITree. More details are shown in the example below.
| rootExpression: | The rootExpression rule will gather information from UITreeRootObject. A rule needs to be added in the root of your project called * UITreeRootObject . |
| Example: | "this.UITreeRootObject" |
| rootNodes: | This should evaluate to an array of UITreeNode objects. This will populate the UITree without additional roundtrips to the server. |
| Example: | None. |
| rootRefchain: | The rootRefchain needs to point to the root's refChain. |
| Example: | R.rootModel.refChain |
| selectedNode: | When an item from the tree is selected a reference is displayed in the 'selectedNode' rule in the UITree model design. |
| Example: | selectedNode new value is: "world.colors.mycolors.myblock.myblock9" |

| selectedNodeBindParent: | Selected Node Bind Parent. Default value is <this>. |
| Example: | None. |
| selectedNodeBindTarget: | Selected Node Bind Target. The default value is "selectedNode". |
| Example: | "selectedNode" |
* Rule Name to add to root : UITreeRootObject
Type: array
Flags: cached
Value:
return [{
"title": "MyColors",
"isExpandable": true,
"nodes": this.MyColors.realChildren.map(c => c.UITreeNodeSpec)
}];
Mixins
UIControlMixin
UIStyleMixin
BaseNode
BaseModel
RULE NAME |
TYPE |
DEFAULTS |
CATEGORY |
FLAGS |
|---|---|---|---|---|
rootExpression |
string |
"" |
UI |
Cached Spec |
rootNodes |
array |
[] |
UI |
Cached Spec |
rootRefchain |
string |
this.refChain |
UI |
Cached Spec |
selectedNode |
string |
"" |
UI |
Cached |
selectedNodeBindParent |
any |
this |
UI |
Cached Spec |
selectedNodeBindTarget |
string |
"selectedNode" |
UI |
Cached Spec |
Technical Notes
You can click on the Design Documentation icon to display a technical documentation for UITree.

Here is that information:
UITree provides two ways of populating the tree, Instant and Delayed.
Instant
UITree has a [[rootNodes]] array rule. This should evaluate to an array of UITreeNode objects. This will populate the UITree without additional roundtrips to the server.
Delayed
UITree has [[rootRefchain]] and [[rootExpression]] rules. when the UITree is created, the client will evaluate [[rootExpression]] in the [[rootRefchain]] model context. The expression must return an array of POJOs in the same form as used in the Instant Data method. Custom UI will populate root level of the tree (one or more nodes) with the data retrieved.
UITreeNode Structure
{
"title": "Name of this Node",
"isExpandable": true|false,
"nodes": [],
"nodesRefChain": "refChain to the model having nodesExpression",
"nodesExpression": "expression returning array of UITreeNodes"
}
These objects can be collected from [[UITreeNodeMixin]] models.
There are two alternate ways to specify a tree:
1.By supplying nodes directly. If [[nodes]] is supplied, [[nodesRefChain]], [[nodesExpression]], and [[isExpandable]] will be ignored.
2.By supplying [[nodesRefChain]] and [[nodesExpression]]. In this case, if [[isExpandible]] is true, the system will request the next level from the server, by using the [[nodesRefChain]] and [[nodesExpression]] values.
You can combine 'Instant' and 'Delayed' approaches. The above controls work at any level.
![]()
Project Example:
In your kBridge Examples Projects folder open the project called ‘Colors’.
Reference Location:
'world.colors.uitemplate.uitree'
Link: https://knowledgebridge.engineer/projects
Open the ‘Colors’ project.
Press the UI start icon to start the User Interface.
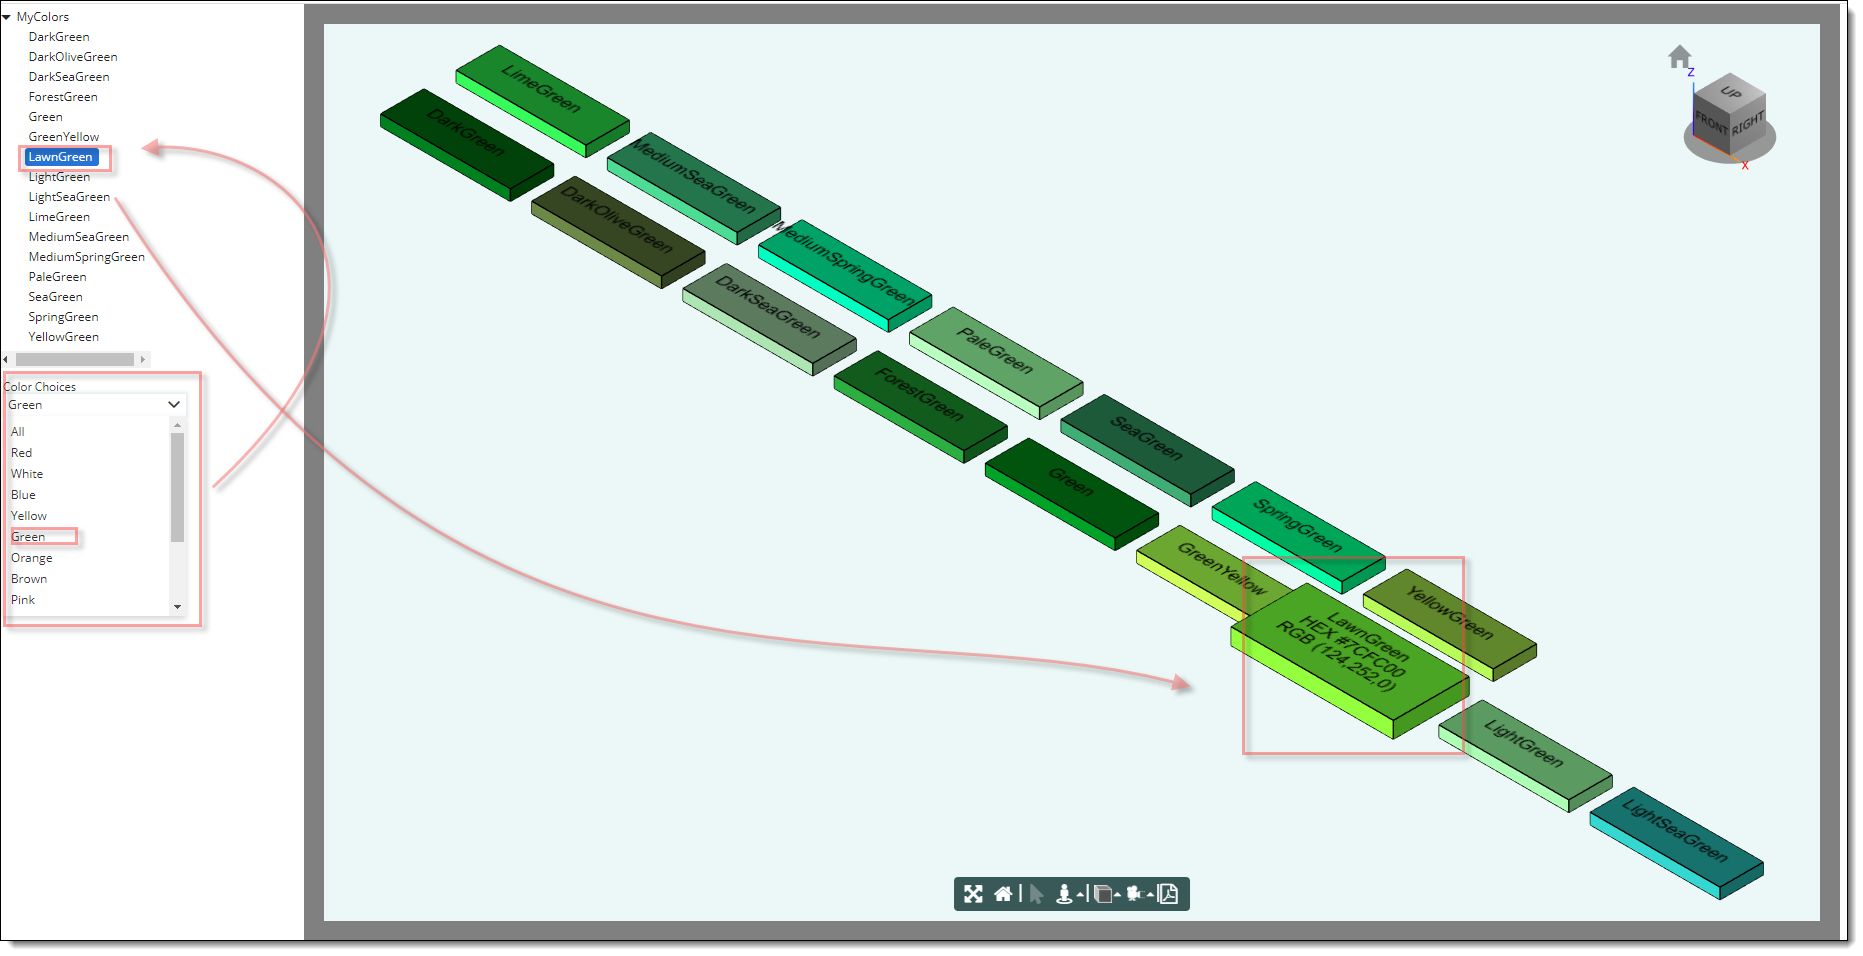
In the Color Choices pull down menu you can select All, or a color and any color with that name will appear in the model. You can also type in your own text.
When you click on a color in the MyColors tree, that color block in the Model view will grow in height, width, length and the text will now include the HEX and the RGB code.
Note: There are 148 Java supported colors.
Here are some rules to follow:
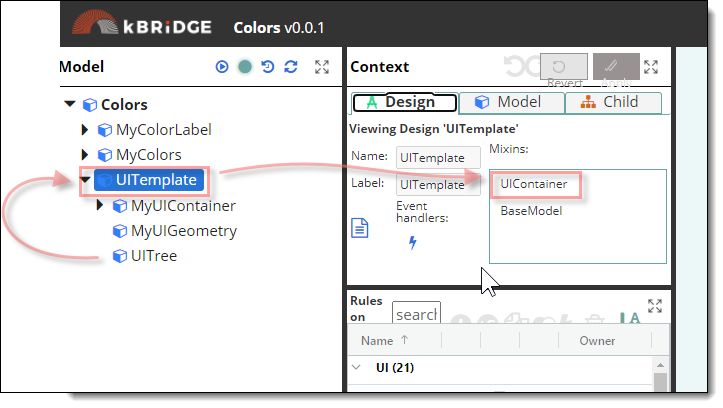
1) The UITree needs to be a child under a UIContainer design. Note UITemplate has UIContainer as a mixin.
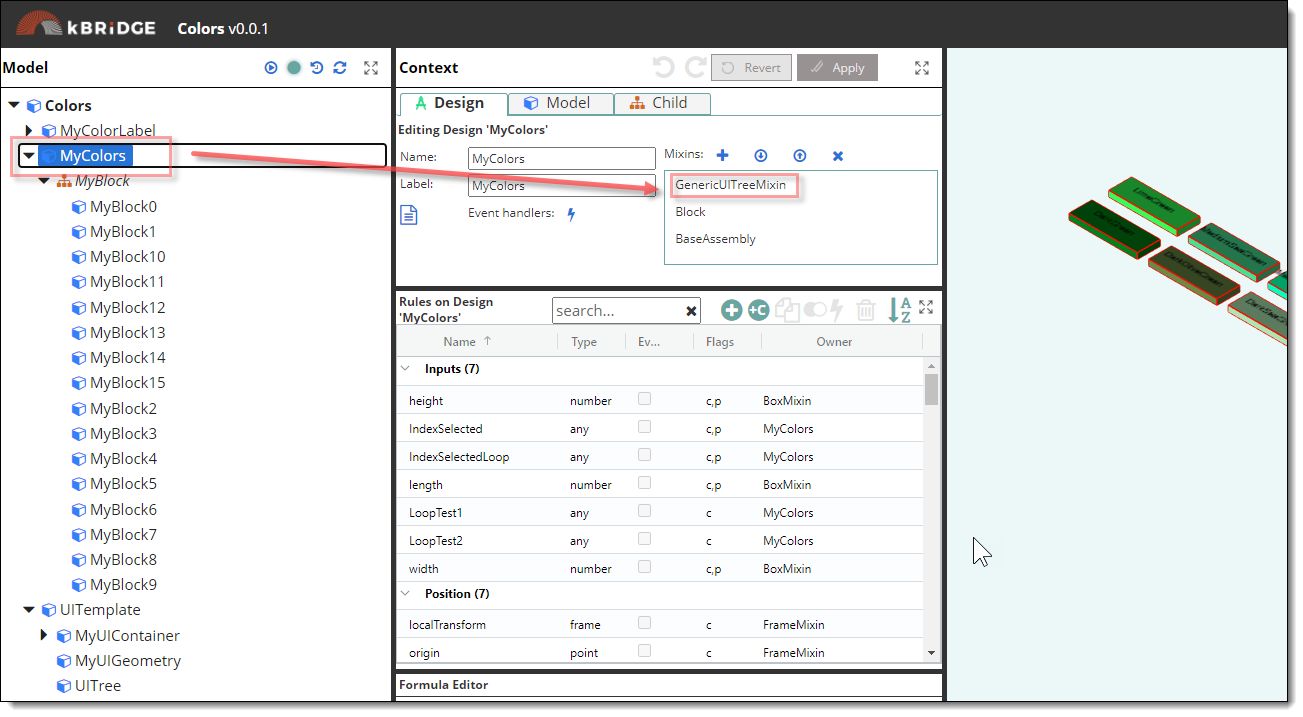
2) Add the GenericUITreeMixin to the assembly that you want to show up in the UI.
3) Add a rule named UITreeRootObject to the root of the project.
Rule Name : UITreeRootObject
Type: array
Flags: cached
Value:
return [{
"title": "MyColors",
"isExpandable": true,
"nodes": this.MyColors.realChildren.map(c => c.UITreeNodeSpec)
}];

Connections
When an item from the tree is selected a reference is displayed in the 'selectedNode' rule in the UITree model design.


Here is an example to change the length by comparing the child.refChain to the selectedNode.
Rule Name: length
if (child.refChain == R.rootModel.UITemplate.UITree.selectedNode){
return R.rootModel.length +.75;
} else {
return R.rootModel.length;
}
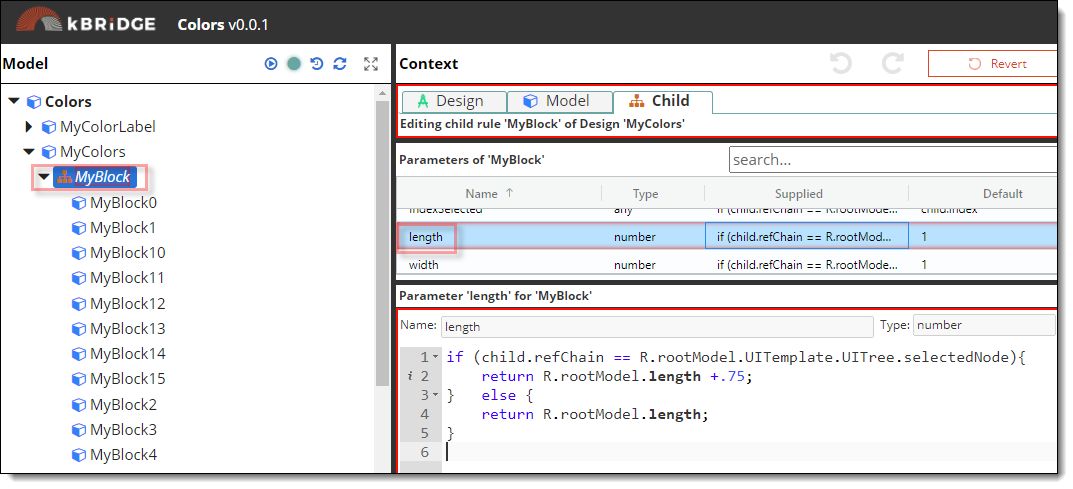
The UITree design can be used to change a number of rules and events.
This example shows some basic uses but using the UITree design can open up unlimited possibilities to add to your projects.