
Description
It is often used to trigger an event. In the example below the triggered event adds 1 ‘numberOfParts’ each time it is clicked.
The ‘numberOfParts’ is the quantity of ‘MyBlocks’.
Parameter Rules
| dataType: | The data type of the model rule that will be created. (Note that "T" must be capitalized) |
| Example: | “boolean” |
| ownerRefChain: | The reference chain of the model that the rule will be create on. |
| Example: | “R.rootModel.refchain” |
| ruleBody: | The rule expression that will be used to calculate the value of the rule. |
| Example: | "true" |
| ruleName: | The name of the model rule to be created. |
| Example: | "add" |
| caption: | This text will appear on the button |
| Example: | "Add" |
| sequenceNo: | This is the sorting number within the UIContainer or UIFieldset that defines where the button will appear. |
| Example: | 0 |
| tooltip: | The text put here will show up when the user moves or hovers the mouse pointer over a trigger area. |
| Example: | "Attaches new component to the end of the line." |
| alignment: | Alignment position of the UIAddModelRuleButton. |
| Example: | “start” |
| Choices: | "start | end" |
| buttonStyle: | Button Style |
| Example: | “secondary" |
| Choices: | "primary | secondary" |
Mixins
UIButtonMixin
UIControlMixin
UIStyleMixin
BaseNode
BaseModel
RULE NAME |
TYPE |
DEFAULTS |
CATEGORY |
FLAGS |
|---|---|---|---|---|
dataType |
string |
"Number" |
Inputs |
Cached |
ownerRefChain |
string |
“” |
Inputs |
Cached required |
ruleBody |
string |
“” |
Inputs |
Cached |
ruleName |
string |
“” |
Inputs |
Cached required |
caption |
string |
“” |
UI |
Cached |
sequenceNo |
Number |
0 |
UI |
Cached |
tooltip |
string |
“” |
UI |
Cached |
alignment |
string |
“” |
Style |
Cached |
buttonStyle |
string |
"primary" |
Style |
Cached |
![]()
Project Example:
In your kBridge Examples Projects folder open the project called ‘MyTable’.
Reference Location:
“world.mytable.tableui.tableui0.inputscontainer.inputscontainer0.contentfieldset.contentfieldset0.contentpanel.contentpanel0.inputscontainerdatatable.add_and_delete.add”
Link: https://knowledgebridge.engineer/projects
Open the MyTable project.
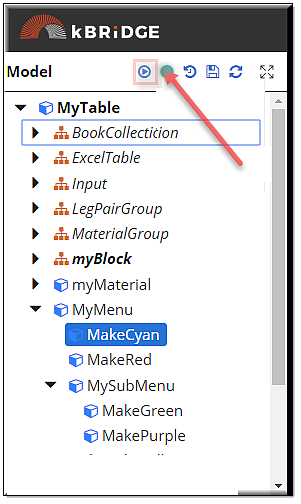
Press the UI start icon to start the User Interface.
Select the UIRadioButton named 'Data'.
Each time the ‘Add’ button is clicked a new Table row is added and a new block will appear. You can change the dimensions, Material/Color, change the Label,
and move the position up/down. The ‘Del’ button will remove the last Table row and also the last block each time clicked.

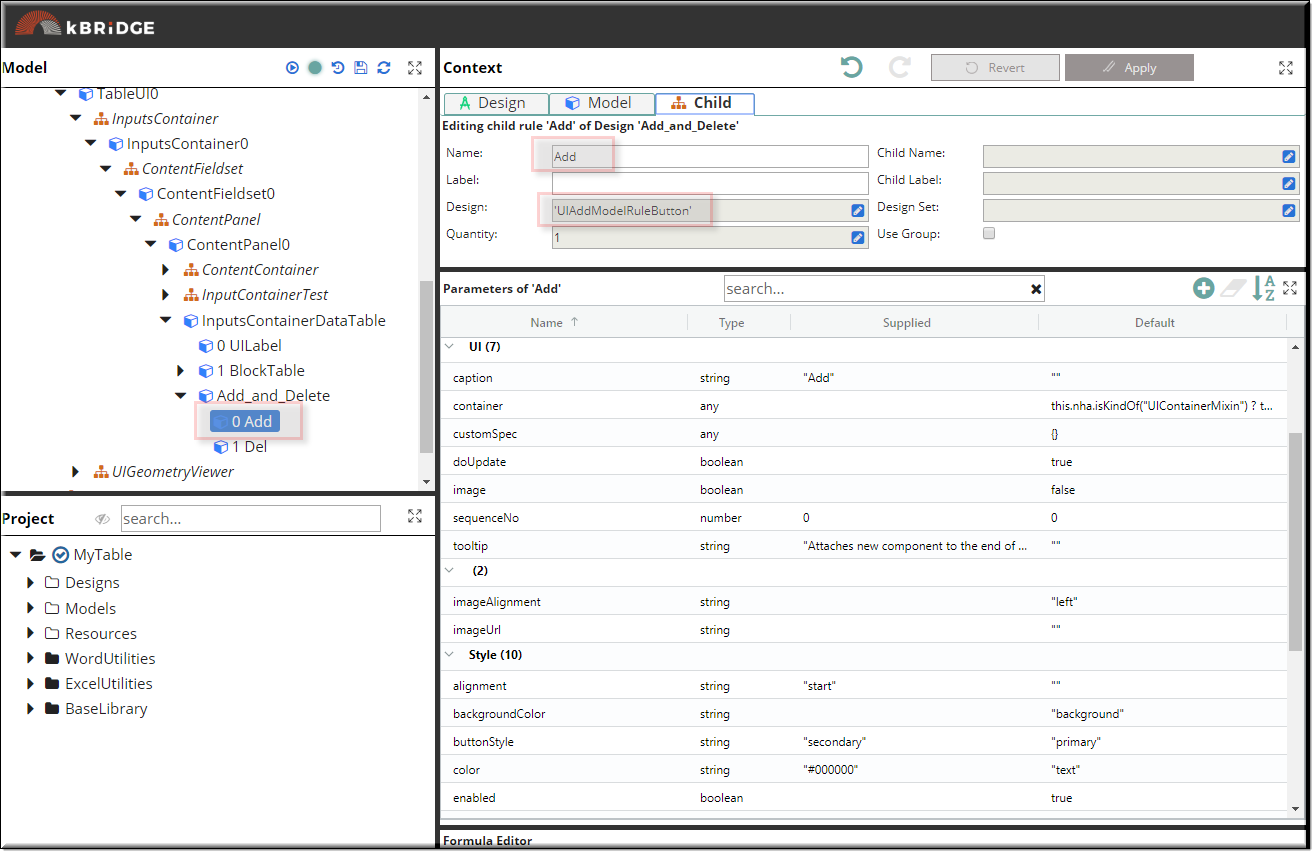
A UIAddModelRuleButton was added to the Add_and_Delete parent and was named ‘Add’
The parameter values were added to the ‘Add’ design.
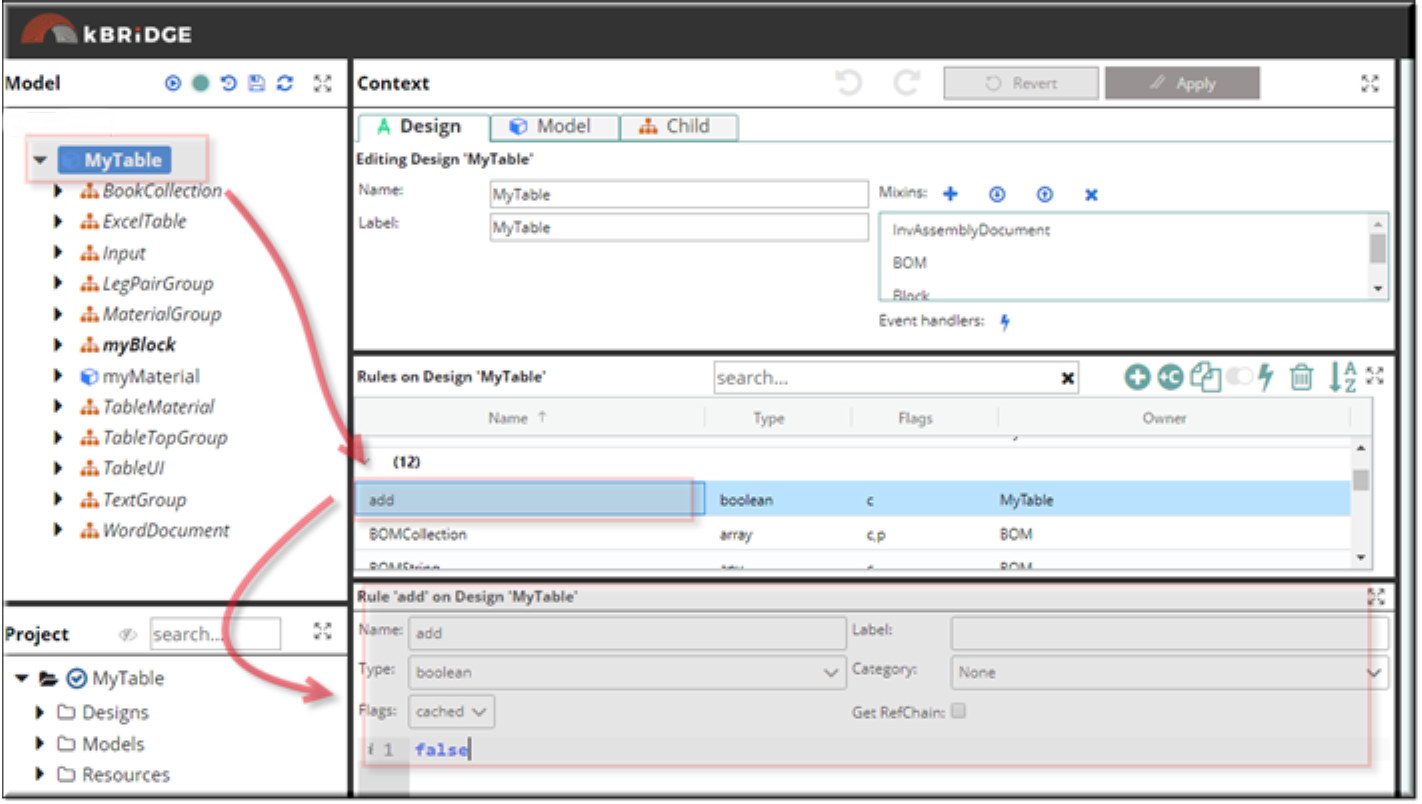
Up in the root (MyTable) a rule was created called ‘add’, its type is a Boolean with a value of ‘false’.
Highlight the add rule and click on the Edit Event Handler symbol. Then type your code into the ‘onCreate’ tab.
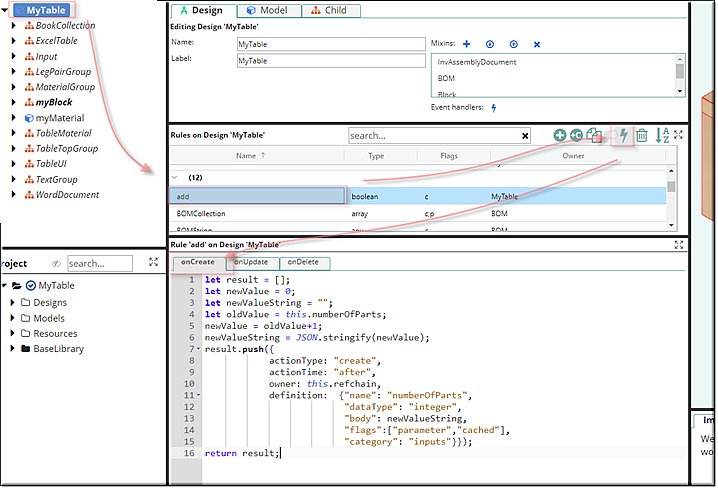
Code:
| let result = []; |
| let newValue = 0; |
| let newValueString = ""; |
| let oldValue = this.numberOfParts; |
| newValue = oldValue+1; |
| newValueString = JSON.stringify(newValue); |
| result.push({ |
| actionType: "create", |
| actionTime: "after", |
| owner: this.refchain, |
| definition: {"name": "numberOfParts", |
| "dataType": "integer", |
| "body": newValueString, |
| "flags":["parameter","cached"], |
| "category": "inputs"}}); |
| return result; |
Then you must enter or copy the same code into the ‘onUpdate’ tab.
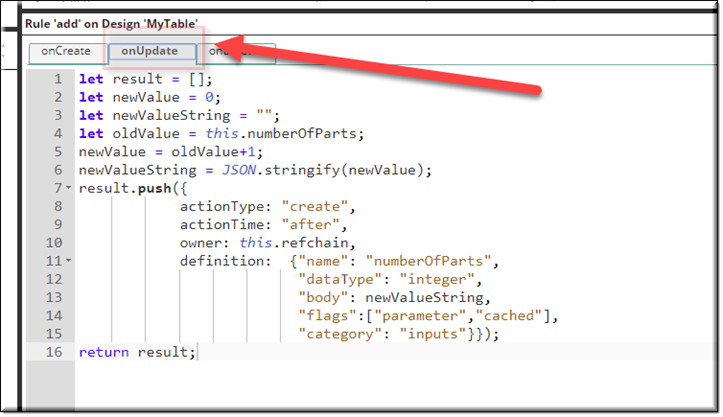
The code in the 2 event tabs are updating the ‘numberOfParts’ quantity. This quantity drives the number of MyBlock children.
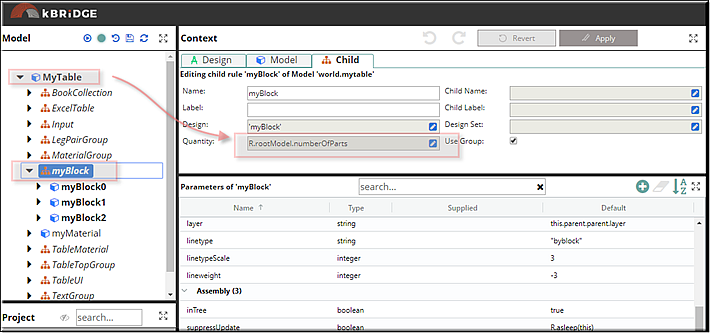
You will need to also create a rule in the root called 'del' and do the same as you did with the 'add' rule. You will need to change the code to this:
Code:
| let result = []; |
| let newValue = 0; |
| let newValueString = ""; |
| let oldValue = this.numberOfParts; |
| newValue = oldValue-1; |
| newValueString = JSON.stringify(newValue); |
| result.push({ |
| actionType: "create", |
| actionTime: "after", |
| owner: this.refchain, |
| definition: {"name": "numberOfParts", |
| "dataType": "integer", |
| "body": newValueString, |
| "flags":["parameter","cached"], |
| "category": "inputs"}}); |
| return result; |