Description
The Material Design defines a material, which is the only way to control the rendering of objects. Even a simple color, when first used,
will create a material by the same name and store it in the material table under that name. Thereafter, any object which specifies the same color in its color parameter will use that stored material. By default, the materials created automatically in this way are defined to look something like plastic, with medium reflectivity, highlighting, and so on.
To create your own materials, you need to use the Material Design defined here. Materials and their properties in general are a very complex topic, and only a simplified version is supported here.
Parameter Rules
| textureUrl: | If non-empty, this is used to load the texture for this material. |
| Example: | R.getUrl({ name: 'BrushedMetal.jpg', id: 'ef88ad17-63de-4d2f-09f2-08d8d802f611' }); ; |
| color: | The color to actually use in this material. This is sometimes called the 'diffuse color'. This should be an RGB value or an existing predefined color name. |
| Example: | If you use the textureUrl rule then leave this blank, otherwise add a color ("Yellow"); |
| materialName: | The name the material will be stored under in the materials table. Thereafter using this in a color parameter will use this specification. It is also possible to override existing materials this way. |
| Example: | 'Material_BrushedMetal'; |
| materialType: | One of none, linebasic, linedashed, meshbasic, meshdepth, meshlambert, meshnormal, meshphong, meshphysical, meshstandard, meshtoon, points, rawshader, shader, shadow, sprite. These are three.js material types. |
| Example: | "meshPhysical"; |
| metalness: | 0.0 to 1.0. The relative 'metalness' of the material. Higher values are more metallic. |
| Example: | 0.5; |
| opacity: | 0.0 to 1.0. 1.0 is completely opaque. The amount of clarity. Note that [[transparent]] must be true for this to have an effect. |
| Example: | 0.5; |
| reflectivity: | 0.0 to 1.0. Controls the level of reflectivity. 1.0 reflects almost all light. |
| Example: | 0.5; |
| roughness: | 0.0 to 1.0. The relative roughness of the material. This affects how it behaves under lighting. Higher values appear rougher. |
| Example: | 0.5; |
| side: | One of 3 values: 'THREE.FrontSide', 'THREE.BackSide', 'THREE.DoubleSide'. These are three.js constants for controlling whether you can see both sides of a surface. |
| Example: | 'THREE.FrontSide'; |
| texture: | The name of the texture to use. Must be in the texture table from an already-defined Texture, or textureUrl should be non-empty. See the [[Texture]] Design for advanced texture definition. |
| Example: | 'Material_BrushedMetal'; |
| transparent: | Set to true to make a material transparent. Then set [[opacity]] to set how transparent it is. |
| Example: | false ; |
Mixins
BaseModel
RULE NAME |
TYPE |
DEFAULTS |
CATEGORY |
FLAGS |
|---|---|---|---|---|
textureUrl |
string |
"" |
Inputs |
Cached |
color |
string |
"Default" |
Render |
Cached |
materialName |
string |
<Empty> |
Render |
Cached Required |
materialType |
string |
"meshPhysical" |
Render |
Cached |
metalness |
number |
0.5 |
Render |
Cached |
opacity |
number |
0.5 |
Render |
Cached |
reflectivity |
number |
0.5 |
Render |
Cached |
roughness |
number |
0.5 |
Render |
Cached |
side |
string |
"THREE.FrontSide" |
Render |
Cached |
texture |
string |
"" |
Render |
Cached |
transparent |
boolean |
false |
Render |
Cached |
![]()
Project Example:
In your kBridge Examples Projects folder, open the project called ‘Materials’.

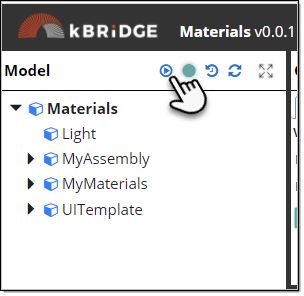
Click on the 'Run Custom UI' icon.

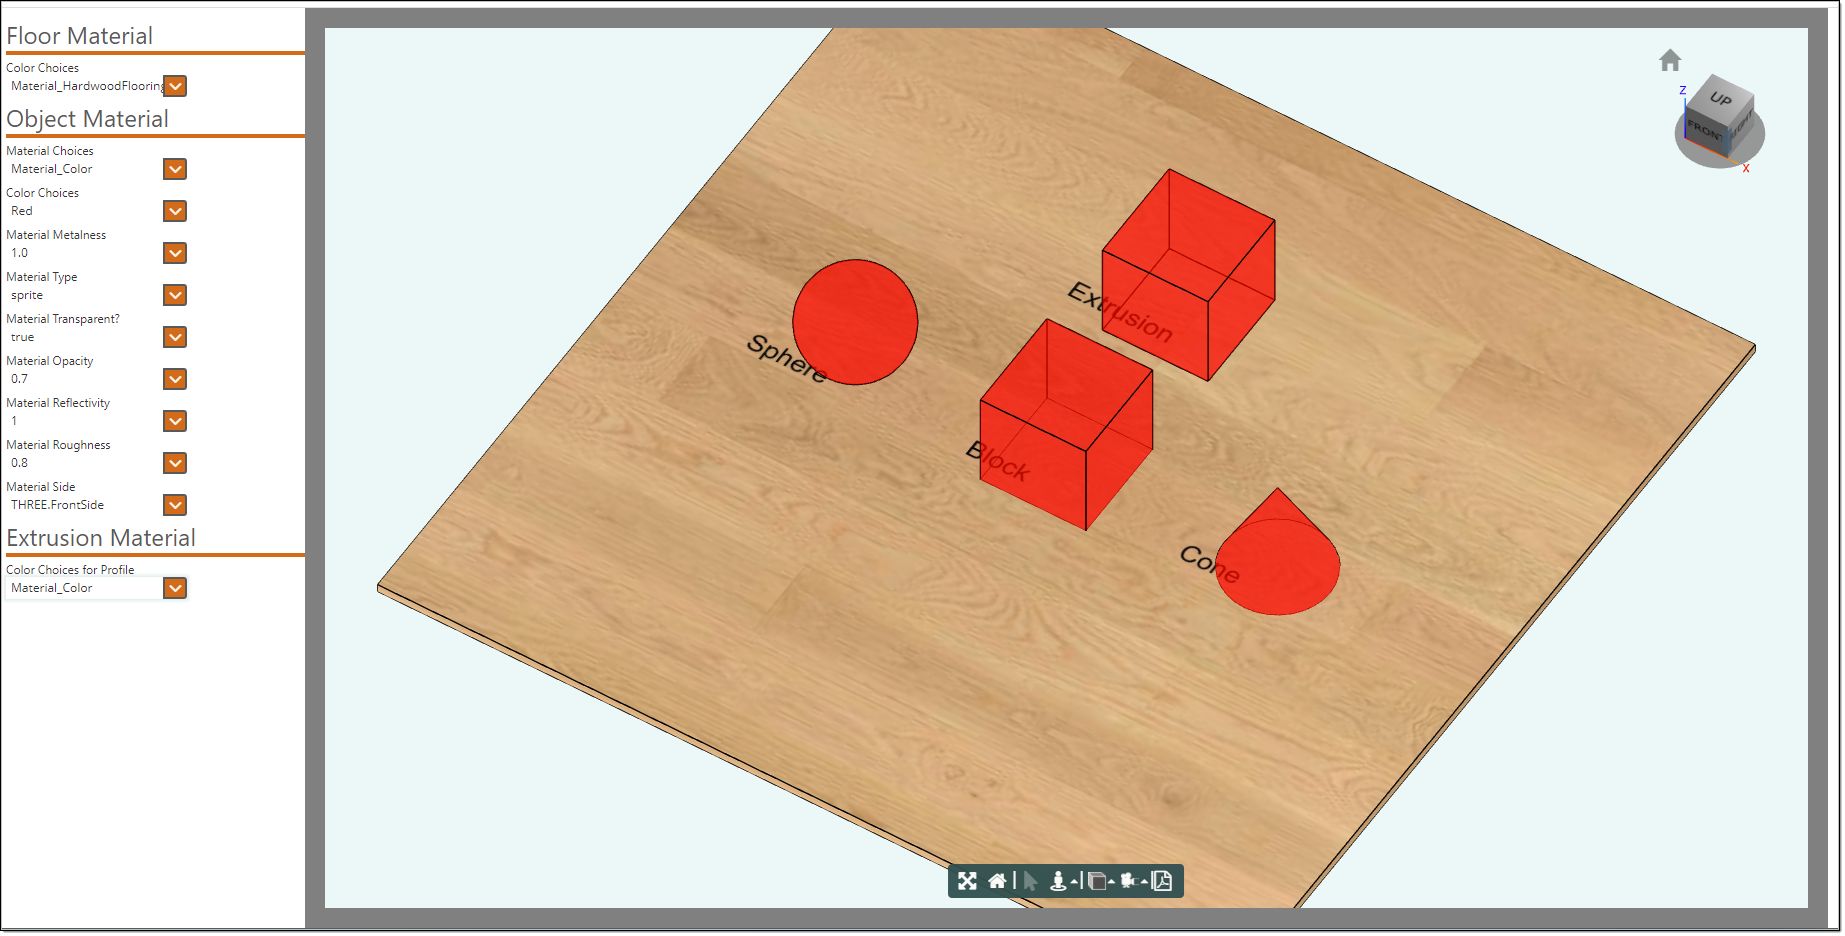
In the Floor Material section you can change the material of the floor. In the Object Material section if you set the Material Choices to Material_Color and set the 'Material Transparent?'
to 'true' then you can change the Opacity levels from 0 to 1 and view the changes.

If the Material selected is set to Material that has textureUrl that is pointing to an image in the Resources folder it can't use the Opacity function, it always look solid.
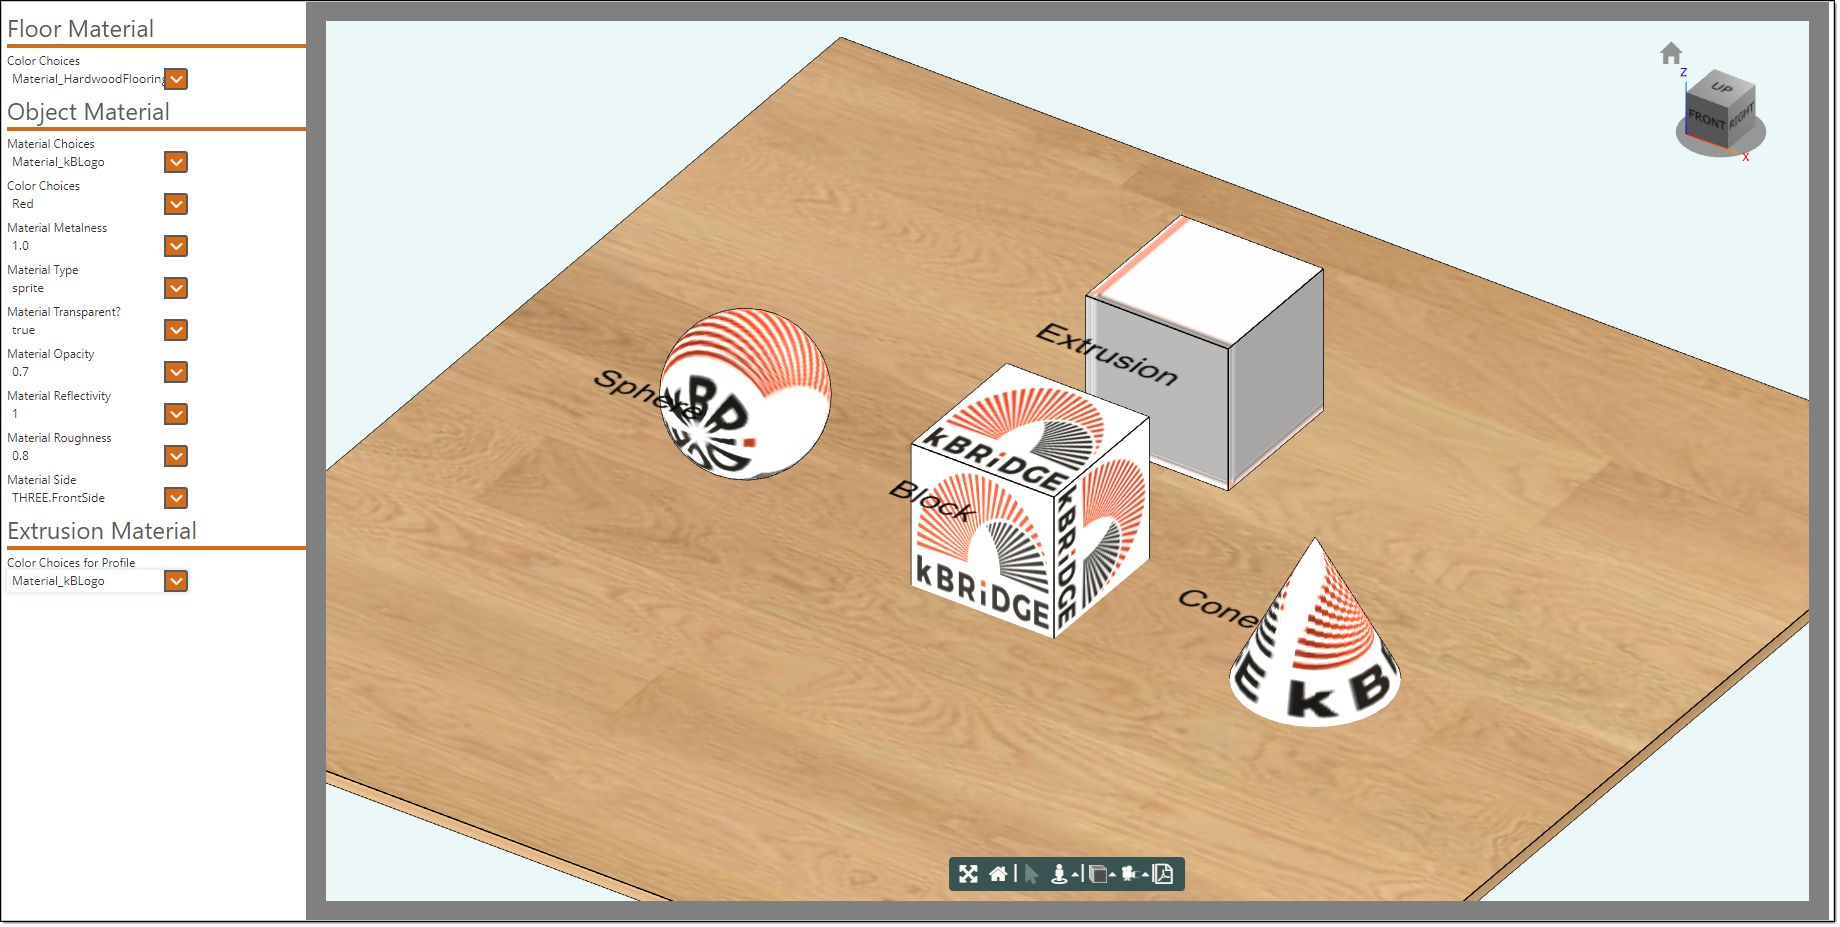
All of the choices except the 'Material_Color' are made from an image in the Resources folder.
Note: If you choose the 'Material_Color' and change the different rules, you may need to choose a different material then change back to the 'Material_Color' for the changes to appear.
Notice how the 'Material_kBLogo' appears on the Sphere, Block, and the Cone. The image is distorted on the Extruded block which was extruded from a Profile.
