Description
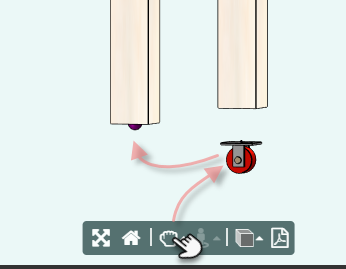
The part or assembly with the DragMixin can be moved in the graphics window by selecting the Drag icon, then left clicking and holding the part or assembly to be dragged to the desired location.
If snapEnable is set to true then the assembly can be dragged and snapped onto a target object, in this case a sphere.
By enabling the gridEnable rule you will be able to drag the assembly and it will snap to the closest grid point. The grid spacing can be set with the gridX, gridY, and gridZ rules to the number desired.
Parameter Rules
| dragEnable: | If set to true then the part or assembly with the DragMixin can be moved in the graphics window. |
| Example: | true |
| gridEnable: | By enabling the gridEnable rule you will be able to drag the assembly or part and it will snap to the closest grid point. |
| The dragEnable or the snapEnable rule must also be enabled for this to work. |
| Example: | true |
| gridFrameName: | Grid frame name, Can leave parameter blank because the default is 'transform'. |
| Example: | "transform" |
| gridX: | This is the spacing distance in the x direction desired. The 'min' and 'max' limit the amount of drag. If 'null' is entered here then you can't drag in the x direction. |
| Example: | return {"size":1,"min":-27.5,"max":27.5} |
| gridY: | This is the spacing distance in the y direction desired.The 'min' and 'max' limit the amount of drag. If 'null' is entered here then you can't drag in the y direction. |
| Example: | return {"size":1,"min":-16,"max":16} |
| gridZ: | This is the spacing distance in the z direction desired.The 'min' and 'max' limit the amount of drag. If 'null' is entered here then you can't drag in the z direction. |
| Example: | {"size":1,"min":-29,"max":-19} |
| rotateEnable: | Allows this model to be rotated. |
| Example: | true; |
| rotateX: | The X-axis rotation specification. Use null (not a string) to disable. snap: 0 disables snapping, other the value is an angle in degrees. Angles are measured relative to the inital orientation. |
| Example: | null;//'min and max' are not Implemented at this time (4/6/2021) |
| rotateY: | The Y-axis rotation specification. Use null to disable. snap: 0 disables snapping, other the value is an angle in degrees. |
| Example: | null;//'min and max' are not Implemented at this time (4/6/2021) |
| rotateZ: | The Z-axis rotation specification. Use null to disable. snap: 0 disables snapping, other the value is an angle in degrees. |
| Example: | return {"snap": 0, "min": 1, "max": 10};//'min and max' are not Implemented at this time (4/6/2021) |
Override this Rule from the DragMixin and make it a parameter
| connectors: | Create this rule to override the same rule from ConnectorMixin, it needs to be a parameter. |
| Example: | [ |
| {"name": "s1", "frameName": "socket1", "keys": [{"key": "brio", "polarity": -1}]} |
| //New value. |
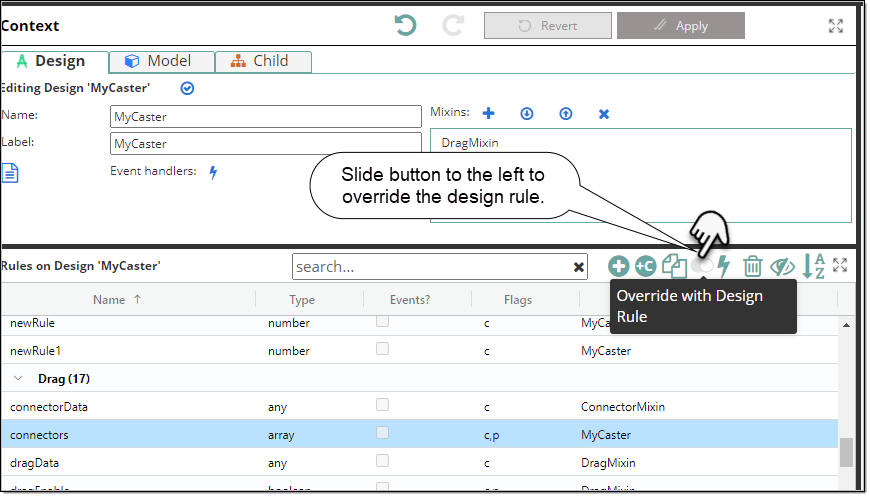
Create this Parameter Rule in the part that you want to drag. ]
| socket1: | Create this rule. |
| Example: | var wf = R.world.transform; |
| var zAdj = child.TopPlateThickness/2; |
| return makeFrame(p(0,0,zAdj,wf),v(1,0,0,wf),v(0,1,0,wf)); |
| //Note: the zAdj adjusts for the thickness of the TopPlate in the example below. |
| socket1: | Type: frame |
| Flags: cached, parameter |
| Category: Drag |
In UIGeometryViewer add these values to the snapSettings parameter rule.
| snapSettings: | Create this rule to override the same rule from ConnectorMixin, it needs to be a parameter. |
| Example: | var visDist = 3 //R.rootModel.VisibleDistance; |
| var snapDist = 4 //R.rootModel.SnapDistance; |
| return {size: 1.5, |
| color: "yellow", |
| highlightColor: "green", |
| transparency: 1.5, |
| visibleDistance: visDist, |
| snapDistance: snapDist }; |
Mixins
ConnectorMixin
RULE NAME |
TYPE |
DEFAULTS |
CATEGORY |
FLAGS |
|---|---|---|---|---|
dragEnable |
boolean |
true |
DragMixin |
Cached |
gridEnable |
boolean |
false |
DragMixin |
Cached |
gridFrame |
frame |
R.world.transform |
DragMixin |
Cached |
gridX |
any |
{size: 0, min: 0, max: 0} |
DragMixin |
Cached |
gridY |
any |
{size: 0, min: 0, max: 0} |
DragMixin |
Cached |
gridZ |
any |
{size: 0, min: 0, max: 0} |
DragMixin |
Cached |
rotateEnable |
boolean |
true |
DragMixin |
Cached |
rotateX |
any |
{snap: 0, min: 0, max: 0} |
DragMixin |
Cached |
rotateY |
any |
{snap: 0, min: 0, max: 0} |
DragMixin |
Cached |
rotateZ |
any |
{snap: 0, min: 0, max: 0} |
DragMixin |
Cached |
snapEnable |
boolean |
this.connectors.length>0 |
DragMixin |
Cached |
connectors |
array |
[ {"name": "s1", "frameName": "socket1", "keys": [{"key": "brio", "polarity": -1}]} ] |
MyCaster |
Cached |
socket1 |
frame |
var wf = R.world.transform; var zAdj = child.TopPlateThickness/2; return makeFrame(p(0,0,zAdj,wf),v(1,0,0,wf),v(0,1,0,wf)); |
Drag |
Cached |
![]()
Project Example:
In your kBridge Examples Projects folder open the project called ‘MyTable’.
Reference Location:
“world.mytable.mycaster”
Link: https://knowledgebridge.engineer/projects
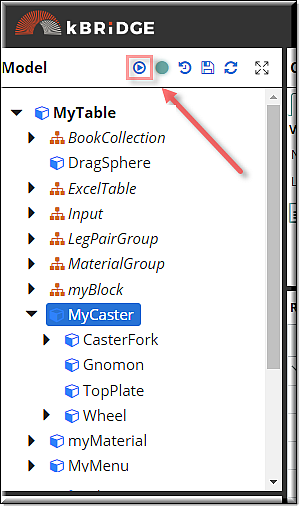
Open the MyTable project.
Press the UI start icon to start the User Interface.
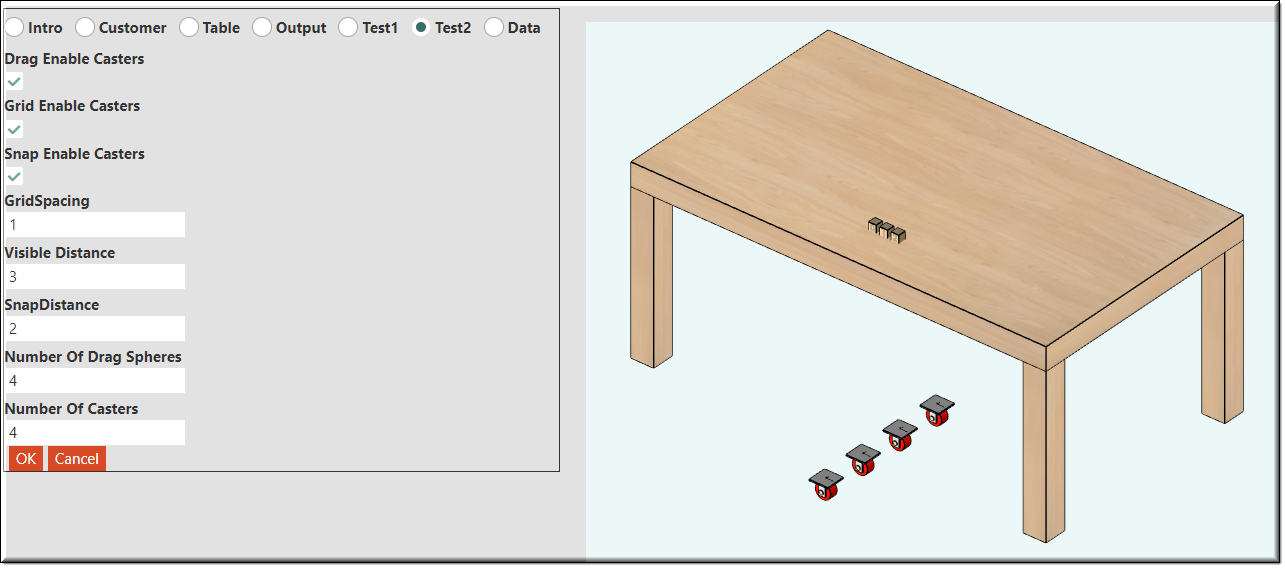
While in the ‘Test2’, enable the Drag, Grid and Snap.
Set the Number of Drag Spheres to 4
Set the Number of Casters to 4
Click OK
Position the table so the spheres at the bottom of the legs are visible.
Select the Dragging icon at the bottom center of the screen.
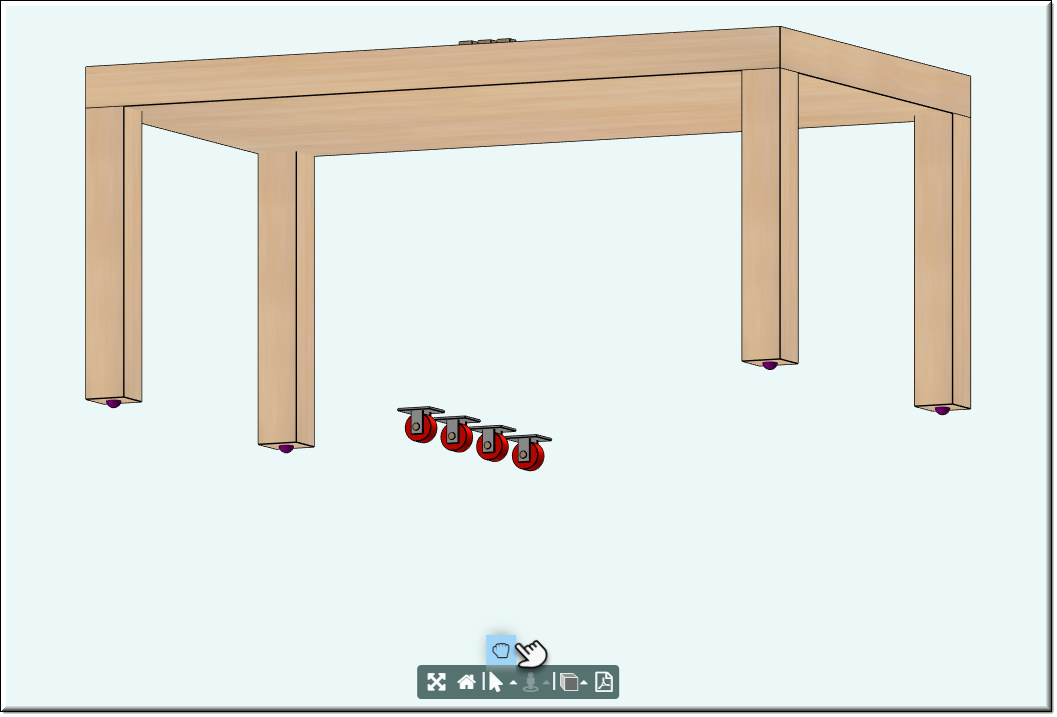
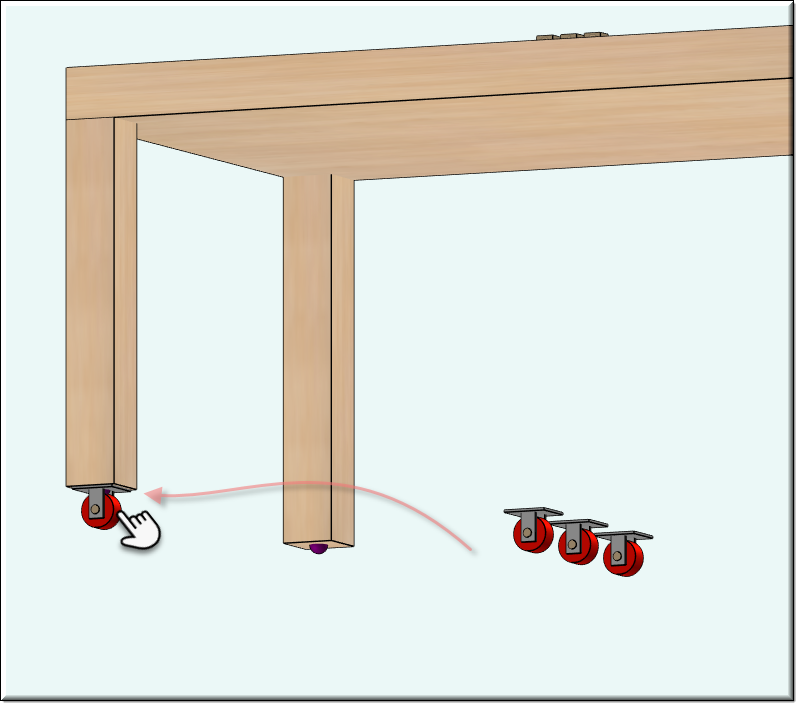
Then left click on a caster, hold and drag it close to a sphere and release.
The caster will snap to the sphere.
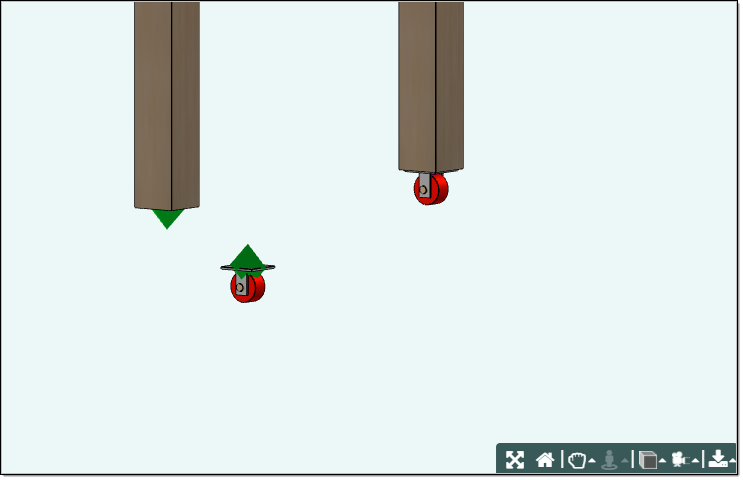
A rule called snapSettings is located in the UIGeometry design. Below is an example of how the values are set in this rule.
snapSetting:
var visDist = R.rootModel.VisibleDistance;
var snapDist = R.rootModel.SnapDistance;
return {size: 1.0,
color: "yellow",
highlightColor: "green",
transparency: 0.5,
visibleDistance: visDist,
snapDistance: snapDist };
Note: the highlightColor will only show up in the UI

The UICheckBox's and the UINumericInput's where placed in an UIForm so the values will not update until the OK button is pressed.
Change the value of the GridSpacing and some of the other fields to see the difference they make on the dragging functions.
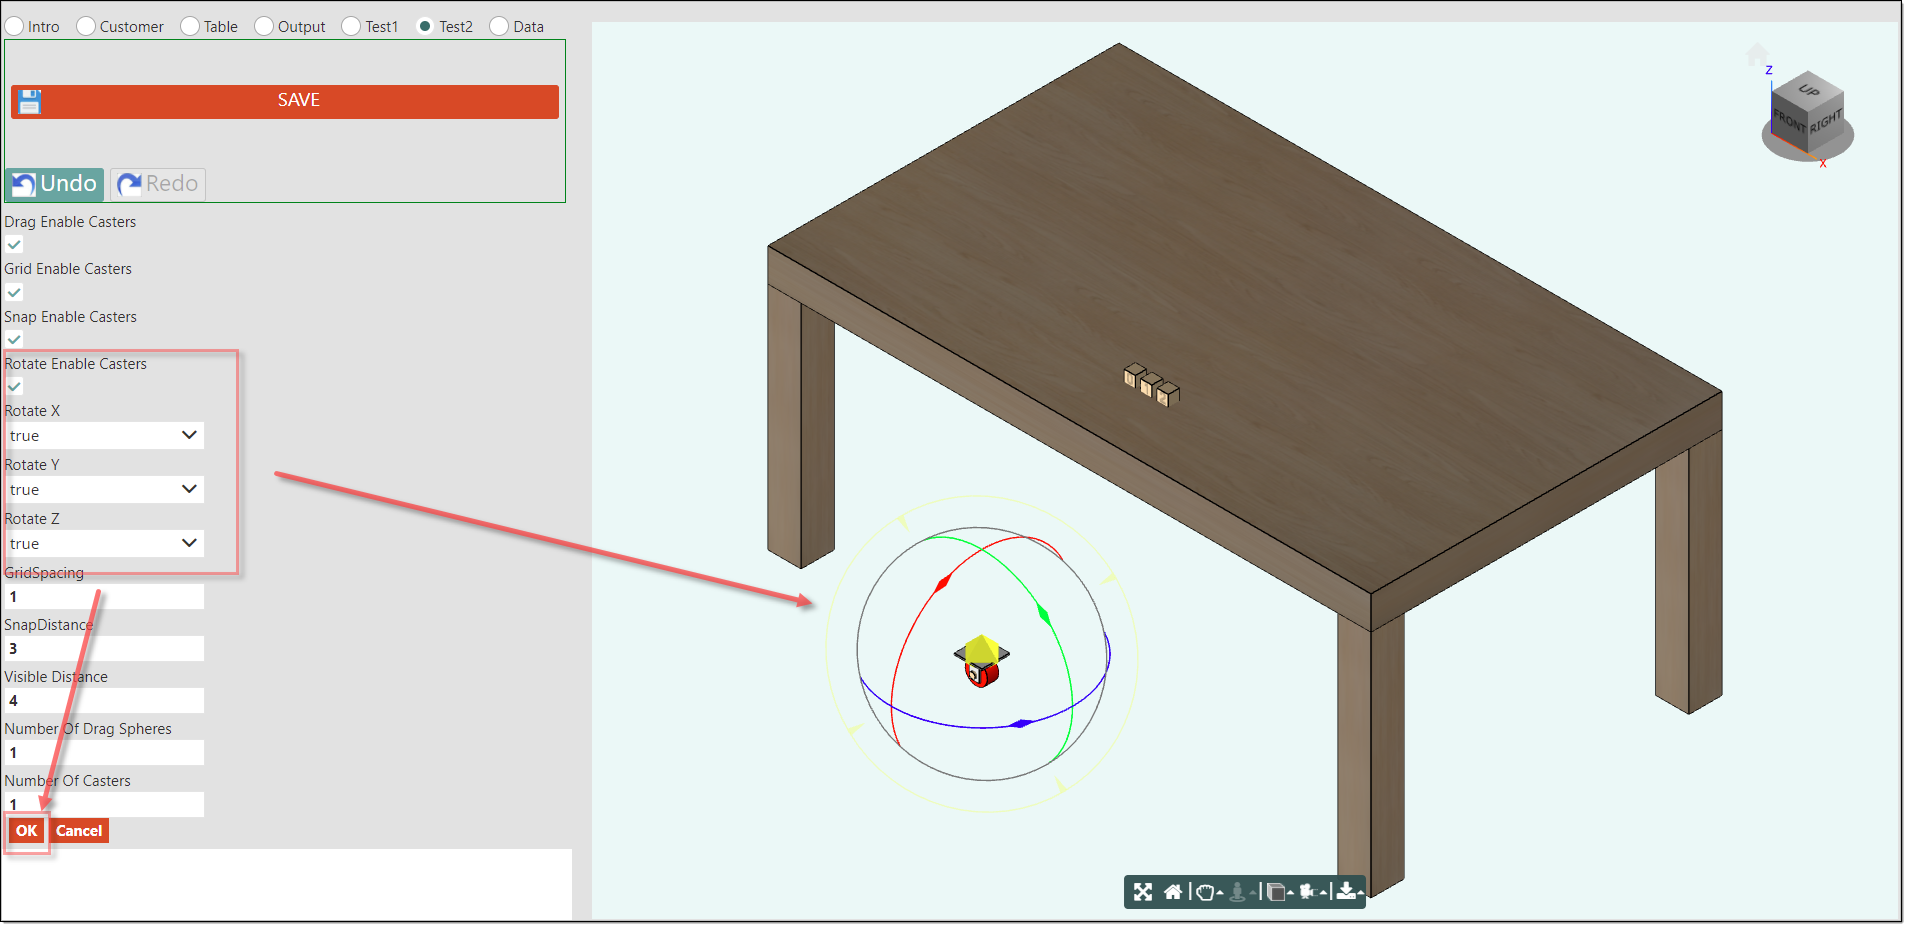
When the rotationEnable rule is set to true and values are put in the (rotateX, rotateY, and rotateZ) rules,
3 color rings will appear. By selecting a ring, hold and dragging it you will see the caster rotate in that direction.
| Red Ring = | X direction |
| Green Ring = | Y direction |
| Blue Ring = | Z direction |
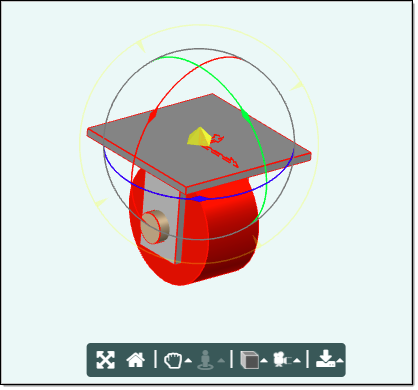
When you set rotateX and rotateY to null then only the rotateZ Blue ring will show up and the Caster can only be rotated in the Z direction.
